Down Bow, Up Bow, Slurs, or Separate? Choosing Good Violin Bowings

How do you know when to use a down bow or an up bow? What’s the difference between down bows and up bows? How do you add in bowings when none are written? How do you change bowings when they are written? Are there any rules for choosing good violin bowings?

These are all very common questions about violin bowing that don't get enough attention. Let’s dive into the world of violin bowings!

Down Bows or Up Bows: How to Choose the Correct Bowing Direction

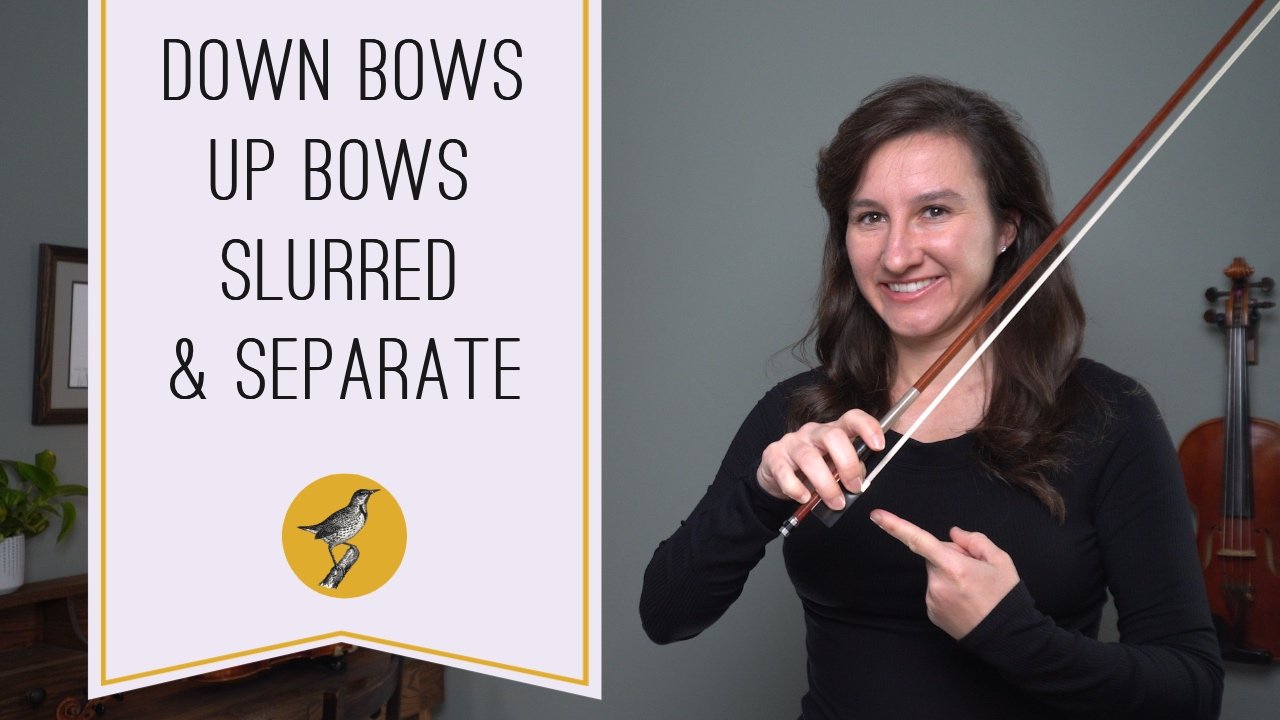
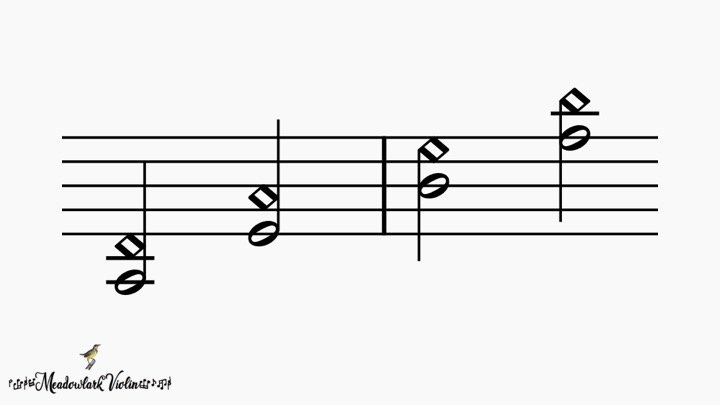
First let’s talk about up bows and down bows. Down bows are when the bow moves from the frog towards the tip. Up bows are when they bow moves from the tip towards the frog. Down bows and up bows are notated by two different symbols.


In general (and this is very general), use down bows for strong beats or down beats and up bows for off beats or weak beats. If you have a single pickup note, it’s usually an up bow. Some passages might feel awkward starting on a down bow, or they might feel awkward starting on an up bow, sometimes it doesn't really matter.

To understand if you should use a down bow or an up bow, try experimenting with both and see what makes sense. You can also try starting in different parts of the bow. This can greatly affect how comfortable and natural the bowing feels.


Down Bows vs. Up Bows: General Rules for Violin Bowings

Most “rules” in music can be broken! But here are some general rules for choosing between down bows and up bows on the violin.

Use down bows for:

  • Strong beats or down beats

  • Forte or loud sections

  • Accents

  • When you need to travel to the upper half of the bow

  • Decrescendos

  • Long, slow bows (especially when they have a decrescendo at the end)

  • The last note of a phrase or song (especially when the last note ends with a decrescendo)

Use up bows for

  • Weak beats or pick up notes

  • Piano or softer sections

  • When you need to travel to the frog

  • When approaching a note that needs to be played “off” the string

  • Crescendos

  • The last note of a song when you want to end with a flourish, a crescendo, or come off the string.


Slurs and Separate Notes

A slur is when we connect multiple notes into one bow. This bowing is notated by a curved line connecting all of the notes in the slur.

Separate notes, or notes that are not connected by slurs are notated different ways. Most often, notes that are separate don’t have any indication other than the absence of a slur. Sometimes separate notes have individual down bows and up bows over each note. Other times you will notice dots or dashes over the notes to indicate articulation and to show that each note is distinct or separate and not slurred together. Playing each note on a different bow is sometimes often referred to as a detaché bow stroke.


How to Choose Good Violin Bowings

Choosing good violin bowings depends on several factors. I would break down my bowing strategy into five groups: ability/ease of playing, sound, tempo, style, and necessity. Let’s talk about each violin bowing strategy!

Ability: How the Level of Your Playing Affects What Bowings You Choose

Sometimes I’ll see a printed bowing and think, “there's no way I can play that bowing!” Or at least, I’m not ready to do it yet!

So I change the bowing to make it easier for my playing ability. For instance, if I’m learning a piece and the printed bowing wants me to slur eight notes in one bow, I might split that up until the tempo is faster and I’m ready to tackle all of those notes in one bow. If I’m dealing with big string crossings, I usually avoid a slur because it’s harder to make it sound good. It’s fine to change bowings to make it easier on yourself. Although you also want to challenge yourself to be able to play more difficult bowing combinations sometimes as well!

Slurring two notes will be easier than slurring four notes at slower tempos.

Easier

Harder


Sounds: Choosing Violin Bowings Based on the Sound You Want to Portray

This is where slurred bows or separate bows come in to play. If I want a smoother sound, I’ll slur the notes together. How much do I slur? Do I slur two notes, three notes, four notes? It depends on the tempo and how much bow I want to use, and what I can comfortably fit into one bow. Separate bowings have their place too and often add to a variety in sound. If EVERYTHING is slurred together in various combinations of slurs, playing detaché or using separate bows can make something stand out (in a good way or a bad way!) It depends on the sound you’re aiming for.


Tempo: Speed Affects What Violin Bowings You Should Use

This is a big one that I don’t think we think about enough. Tempo plays a big factor when determine what bowing you should choose.

The slower something is, the harder the slurs and long bows will be to play on the violin. It’s much easier to slur eight sixteenth notes in a fast tempo than eight quarter notes in a slow tempo. This is also one reason why the bowings might change from your initial “learning” tempo, to your actual performance-ready tempo.

Style and Musicality: Choosing Violin Bowings for Different Musical Styles

When it comes to musicality, more advanced bow strokes come in to play like hooked bowings, louré bowings, “off” the string strokes like spiccato and staccato, or even bow lifts. As you get a feel for different styles of playing (Baroque, Classical, Romantic, Fiddle) you’ll get an idea for what bow strokes would work best in certain areas. When it comes to musicality, if you have an important, long, accented note you would probably want to start it on a down bow at the frog. If you want to start something very softly, you would start at the tip on an up bow.


Necessity: Choosing Violin Bowings Often Depends on What Needs to Happen

A lot of decisions fall into this category. You might change a bowing somewhere just to make a bowing further down the line work out. Sometimes certain bow strokes or bowings are used for musicality, but sometimes they’re more for bow planning. For instance, if there was a certain note you really wanted to start at the frog, you might slur the previous notes into one long up bow to get you where you need to be. Use the bow as a tool to help you!


When You Can’t Change the Bowings

As a violin teacher, I always encourage my students to make their own decisions when it comes to choosing bowings. If there is a bowing you don’t like, as long as you are consciously changing it and have a good reason, that’s fine with me!

However, there are certain times when changing a bowing to fit your own needs is a no-no. And that’s orchestra time! Everyone needs to bow in the same direction in orchestra. So if you’re part of an orchestra, coming up with your own violin bowings probably isn’t the best idea unless you are the concertmaster or principal second! However, if you do have suggestions for bowings, ask your section leader or conductor.

The Takeaway When it Comes to Choosing Violin Bowings

So as you can see, when it comes to deciding on violin bowings the main thing to remember is…it depends. Choosing good violin bowings depends on your ability, the tempo, style characteristics, and your own personal decisions of musicality and phrasing. Most of all, deciding what bowing to choose comes down to trial and error. And this is where experimenting comes in handy. And you know what I think about experimenting!

Happy Practicing!

P.S. The bow is your most useful tool for creating musicality, expression, and phrasing. Do you want to learn more about how to control the bow, relax while playing, and develop a better sound? The Secret to Better Bow Control is just one of the courses you get access to when you become a Meadowlarker and sign up for my online studio! Learn more here.

Master the Basics: Easy Violin Scales and Arpeggios for Beginners

Hello, fellow violin enthusiasts! I'm Lora from Meadowlark Violin, and today I'm excited to share with you the secrets of mastering three super easy scales and arpeggios tailored for beginners. Scales are the backbone of every violinist's practice routine, serving as the essential building blocks for honing your technique. Whether you've just started playing or have a few weeks or months of playing under your belt, these scales and arpeggios will set you on the right track.

I’ll be teaching you all of these scales by ear, no sheet music required! Learning scales and songs by ear is great for intonation, even if you already read music.

The Magic of Finger Patterns

What makes these scales super easy, you ask? Well, they all share the same finger pattern. That means learning one pattern opens the door to playing three different scales. Understanding finger patterns can simplify the learning process, and repetitive finger patterns don’t just stop with easy scales. As you progress on the violin, you’ll notice advanced scales spanning several octaves can share the exact same finger pattern as another scale in a completely different key. (Learn more about universal scales and violin finger patterns here.)

Dive into D Major

Let's kick off our exploration with the D major scale. With two sharps (F# and C#), we delve into the world of half step pairs. Half steps occur where two fingers are touching on the violin.(Learn more about half step pairs and how scales work here.) F# and G, and C# and D, form our two half step pairs for D major. As we start on the open D string, I'll guide you through the notes, creating a musical journey akin to the first two notes of "Happy Birthday."

On the D string, play the open D string followed by the first finger, second, and third finger. All of the notes will be a whole step apart except for the second and third fingers. These notes are F# and G and that’s one of our half step pairs, so those fingers will be touching. Repeat that exact pattern on the A string for a complete D major scale.

Transition to A Major

Next on our musical adventure is the A major scale. With three sharps (F#, C#, and G#), we adjust our half step pairs. Our new half step pairs are between G# and A, and C# and D. The finger pattern remains consistent, allowing a smooth transition from D major. Simply play the exact same finger pattern, but on the A and E strings. Tada! An A major scale.

Venture into G Major

Our final destination is the G major scale. Utilizing the same finger pattern, we seamlessly navigate between the G and D strings. The magic lies in the continuity of patterns – one pattern, three scales. The consistent approach makes G major as accessible as the previous ones, empowering you to expand your repertoire. Can you determine what the half step pairs are for G major based on the finger patterns? The half step pairs are B and C and F# and G.

Arpeggios Unveiled

Now that we've mastered the scales, it's time to delve into arpeggios – a sequence of individual notes forming a chord. Let’s start with the D major arpeggio, which consists of the notes D F# and A. On the D string, play the open D followed by the second finger. Then move over to the A string. Play the open A followed by the third finger. That’s a basic arpeggio pattern! The same pattern is applied to A major and G major arpeggios, simply start on the A string for an A arpeggio and start on the G string for a G arpeggio.

Conclusion: Embrace the Patterns

In conclusion, mastering the basics of violin scales and arpeggios is akin to unlocking a musical treasure chest. By discerning and embracing these patterns, you pave the way for easier and more enjoyable learning experiences. Remember, the violin might seem intricate, but patterns are your allies.

Trills, Turns, Mordents, Slides, and Grace Notes (Common Violin Ornaments Explained)

If you’ve ever seen a sideways “S” in music or maybe some squigglies above a note, you’ve run into some violin ornaments or embellishments. Not to worry! These crazy looking symbols aren’t that hard to understand. I’ve identified the 5 most common violin ornaments you will see in classical violin music and fiddle music. Get ready to finally understand trills, turns, mordents, slides and grace notes in violin music!

Want to Download and Print This Ornaments for Violin Chart?

Just click here to print out this free chart!

How to Play a Trill on the Violin

Trills in violin music are notated with a “tr” over the note. To play a trill on the violin, simply hold down the main note that is printed and rapidly tap the next higher note. So if you have a trill over an F#, 2nd finger on the D string, you would rapidly tap the 3rd finger G while holding the F# down. This will make the trill sound like a bird trilling or a flutter. You can start slow and gradually speed up tapping the next higher note.


What is a Sideways S in Violin Music? A Turn!

You will often see some funny-looking sideways S’s in violin music. That’s a turn. How do you play a turn on the violin? It’s not as difficult as it seems.

If the turn is over an F, you would start on the note above the printed note, then play the actual printed noted, then go one step below the printed note, then back up to the printed note. Once you practice turns on the violin a few times, you will get the feel for what they sound like.

But sometimes the S is reversed, or sometimes the sideways S has a slash through it. That’s an inverted turn.

It goes the opposite direction of the normal turn. Start one note below the printed note, go up to the printed note, keep going one more note above the printed note, then back down to the printed note.

Remember, whether it’s a regular turn or an inverted turn, you always end on the printed note. What changes is what note you start on.

How Do I Play a Mordent in Violin Music?

First of all, what is a mordent!? Well it looks like a squiggle above a note. Like this.

See how it kinda of looks like an “m.” Use that to help you remember “mordent".” You can think of a mordent in violin music like a min-trill. To play a mordent on the violin, all you do is quickly play the next higher note once and then return to the original printed note.

You also have inverted mordents. That’s the squiggle with a line through it like this.


To play an inverted mordent, you’ll just start on the printed note, go down one note and then back up to the printed note. Simple as that!

How to Play a Slide in Fiddle Music?

Slides are very common in fiddle music. A slide is notated by an angled line leading up to a note. Like this.

To play a slide on the violin, just place the finger about a half step below where you would normally place the finger then slide up into the printed note. Think of it like you accidentally played an out of tune note and you’re quickly sliding into the correct note and that’s a slide!

How to Play Grace Notes on the Violin

The last type of violin ornament we’ll talk about is a grace note. Graces notes can be single or multiple. Grace notes are the little notes before or after a normal, printed note. They can be played on the beat or before the beat.

Different Types of Grace Notes: Acciacatura and Appoggiatura

If the grace note has a slash through it, it’s technically called an acciacatura. Acciacatura means “crushed.” The acciaccatura or slashed grace note is played before the beat.

If the grace note doesn’t have a slash, it’s an appoggiatura. Appoggiaturas are played on the beat and essentially steal time from the main printed note. Appoggiaturas often have a sense of leaning on the grace note and resolving to the main printed note.

Those are the 5 most common ornaments and embellishments you’ll see in violin and fiddle music!

Do you want more music theory for the violin?

Check out my course on music theory for the violin. It’s over 6 and a half hours of helpful information on music theory! Everything you ever needed to know!

Happy Practicing!

Easy Violin Harmonics Explained!

Harmonics on the violin often seem over-complicated and confusing, but harmonics on the violin are actually some of the easiest notes to play on the violin! Not only are they easy to play, they’re easy to recognize in music. After you go through this easy guide to violin harmonics I think you will find these special notes on the violin not only easy, but fun to play!

Here’s some common questions about violin harmonics that we’ll cover in this easy guide to harmonics. (Skip ahead if you like).

What are violin harmonics?

How to play violin harmonics?

What are the different types of harmonics?

What’s the difference between natural and artificial harmonics on the violin?

How are harmonics notated?

What are the most common harmonics on the violin?

How are artificial harmonics notated?

What’s the most confusing way to notate harmonics that I’ll probably never see in violin music? (I’m glad you asked. I’ve got an answer for you)

What Are Violin Harmonics?

The definition of a harmonic is: a wave whose frequency is multiple of the frequency of the same reference wave.

Got it? Okay, good. Moving on.

Just kidding. You don’t need to know anything about waves, overtones, nodes, frequencies, etc to understand violin harmonics.

What is my definition of a harmonic? A note that is played by lightly touching the finger to a particular place on the violin string, which produces a whistling sound.

When you are playing a harmonic, you are touching the string so lightly that you are actually allowing both parts of the string to vibrate (the parts of the string to the left and right of your finger). Think about it. When you put a finger down on the violin fingerboard normally, you’re allowing the string in between the finger and the bridge to vibrate, but the part of the string in between your finger and the nut of the violin doesn’t vibrate.

Allowing both sides of the string to vibrate is one of the things that gives a harmonic its characteristic whistling sound.

How to Play Harmonics on the Violin

Look at your string from the nut (the grooved part at the bottom of the peg box where the strings are touching) to the bridge. Do you see that distance between the nut and the bridge? On a full size violin that’s about 13 inches. You can either measure or just eyeball it, but lightly touch your finger to the string at the mid-point of the string. I do this with my fourth finger but you can do it with any finger. Move your finger around until the harmonic speaks.

Tada! You’ve found the most common harmonic on the violin. The harmonic will occur on the same place on every single string.

What you are playing is a natural harmonic on the violin. It occurs when you divide the string in half. That ration of 2:1 is the simplest ratio you can get, so the harmonic produced there is going to be really easy to play.

There are other natural harmonics on the violin. For instance, if you divide your string length into thirds, you’ll find there’s a natural harmonic right where your 3rd finger would go in first position. (Ever wonder why that finger is a “ring tone” on your violin that really rings when it’s in tune? Now you know).

There’s also a natural harmonic where the fourth finger goes in first position. Just try lightly touching the string and scoot your finger all the way up the fingerboard. You’ll hear lots of natural harmonics. The ones that sound clearly are more simpler ratios. The harmonics that don’t speak so easily are more complicated ratios like 7:1.

What Are the Different Types of Harmonics on the Violin

There’s only two types of harmonics on the violin: natural harmonics (what you just played) and artificial harmonics.

What's the Difference Between Natural and Artificial Harmonics?

Natural harmonics occur when you lightly place your finger on the string. On a full size violin the length of the string from the nut to the bridge is about 13 inches. So you’ll find natural harmonics at certain places, like 6.5 inches up from the nut (the exact middle of the string) Or 4.3 inches up from the nut (the string divided into thirds).

Well those same ratios exist even when playing on a different length of string.

Let’s say we put our first finger down firmly on the first finger in first position. Guess what?! You’ve changed the string length! You’re no longer dealing with a 13 inch string. You’re dealing with something more like a 12 inch string. That means those harmonics that occur when you divide the string in 2 or divide by 3 are going to occur at different places.

So if you keep your first finger down and lightly touch the 4th finger with your pinky, you’re essentially dividing that string into thirds. That’s an artificial harmonic!

An artificial harmonic occurs on the violin when you create an artificial “nut” by placing the first finger firmly down on the string and then placing another finger lightly on the same string to divide the string into thirds and play a harmonic.

How Are Harmonics Notated on the Violin?

There are four ways to notate natural harmonics on the violin. The first two are the most common, but you’ll occasionally see the second two.

The most common natural harmonics are usually notated with a 4 and a 0 or circle. You’ll find this notation for that common natural harmonic that occurs right in the middle of the string.

For the other natural harmonics, it’s common to see the note head in an open diamond shape. Sometimes you will also get a number like 3 and a 0 to indicate that note is a harmonic.

Sometimes you will see an open string below a diamond shaped note. The lower string is telling you what string to play this harmonic on. In the example below, you would lightly place your 3rd finger on the “G” note on the D string.

What Are the Most Common Harmonics on the Violin?

These are the most common natural harmonics on the violin. You can play them with third finger in first position, 4th finger in 1st position, or 4th finger in 4th position.


How Are Artificial Harmonics Notated?

Artificial harmonics often look like a double stop (two notes at once). But the bottom note will look like a normal note and the note on top will be diamond shaped. This is telling you to firmly place the bottom note wherever you would normally place it if it were just by itself. Now lightly place your pinky on whatever note the diamond shaped note is indicating (always on the same string).

Sometimes artificial harmonics look like this.

That’s really all you need to know to be able to identify harmonics in music. Sometimes you’ll see the word harm. to indicate the notes are harmonics. Sometimes you’ll see the word flag. which is short for flageolet, another word for harmonics. But that is somewhat rare.

What's the Most Confusing Way to Write Harmonics?

Wait, you mean you’re not confused? You’re disappointed because you thought harmonics would be sooo much more complicated? Alright, alright. Let me try and confuse you with this form of harmonic notation that you’ll rarely see in most violin music.

So what in the world is this trying to tell us? Are these artificial harmonics or natural harmonics? They’re natural harmonics trying to masquerade as some unnatural aberration.

Sorry natural harmonics, you’re just not that confusing.

Okay, stay with me here. The bottom note tells you what open string to play the harmonic on. The diamond shaped note tells you where to lightly place your finger. And the note in parentheses tells you what pitch is actually sounding.

The diamond note is the only important note in my opinion. The other two notes are completely unnecessary. The bottom note is not needed because where else would you play those diamond shaped notes? How about that first one? Do you want to try and play that G on the E string? Hmmm….probably not a good idea. Why don’t you just play it where you would always play that note! On the D string!

What about the second example? Where else are you going to play that low B? Well there’s only one string you can play that harmonic on, the G string, so your options are kind of limited.

How about those top notes in parentheses? Those are the pitches you are actually producing when you play that natural harmonic. The good news about natural harmonics is that if your finger is in the right place, the harmonic is in tune! No need to get out your tuner to see if that natural harmonic on the D string with 3rd finger is actually indicating that high D.

Composers have already done all the hard work to figure out what pitch they want to sound at that particular place in music. So the parenthetical notes are way more information than you need and often left out of most violin music.

I hope you enjoyed this easy guide to violin harmonics! If you would like more music theory, check out my course on Music Theory that covers pretty much every topic imaginable!

Happy Practicing!

~Lora


Half Steps, Whole Steps, and Why They Are Important for the Violin

Half Steps.jpg

Most beginner violinists have a big fear: knowing where to put their fingers. While there are no frets, keys, or markers of any kind on a fingerboard, that doesn’t mean we aren’t using a framework to help us. That framework is built out of…you guessed it, half steps and whole steps.

What is a half step and whole step? First, let’s start with intervals which are measured distances between one note and another note. These distances are measured using half steps and whole steps. A half step is the smallest distance between one note and the next. On the violin, a half step is when your fingers are basically touching each other. A whole step is two half steps.


Half and whole steps are a lot easier to see on the piano. A piano keyboard is made up of white and black keys.

piano-keyboard-diagram.gif


Do you see how there is a repetition of 2 black keys then 3 black keys? This pattern continues all the way up and down the keyboard. A half step is the distance from a white key to the black key that touches it. If you move to the right, the closest black key is a sharp. If you move to the left, the closest black key is a flat. Take the note D. If you move up a half step, you’ve reached D#. If you move down (left) a half step from D, you have D flat. On the violin, moving up towards your bridge makes a note sharp and moving back towards your scroll makes it flat. On the piano, if you go from one black key to its nearest white key, you are also traveling a half step. D# to E is a half step.

If you study the keyboard you’ll notice there are two instances where white keys are touching each other with no black key in between them. These two instances occur between B and C and between E and F. That’s because B and C and E and F are half steps apart from each other respectively. If you go up a half step from B you get C (not B#). Other than these two instances, if you travel from one note to the next note in the musical alphabet you are traveling a whole step. For instance, G to A is a whole step (you can also see how you’ve traveled two half steps: G to G# and G# to A).

It’s very important to remember those two sets of half steps between white keys. It’s going to make a lot of sense once we start talking about scales. For now remember B and C and E and F. I use the mnemonic “Buy Chocolate” and “Eat Fudge” to help my students remember.

So how does this help your violin playing? Two ways. Half steps and whole steps make up your invisible framework on your fingerboard and they also help with intonation. This is where ear training can really come in handy. All intervals can be associated with certain songs to help you identify them. A half step sounds like the beginning of the theme song from Jaws.

Choose any note on the violin and play “Jaws” using one note and a half step above that note. Your fingers should really be touching. Almost all beginners have trouble with their half steps being too far apart. Try playing “Jaws” again but this time scoot your half step finger up a little from the first. It doesn’t quite sound right, does it?

C Major Fingering Chart for Violin

Now let’s talk about how half steps and whole steps make up your invisible frame work. Your half steps and whole steps will change depending on what key you are in. Let’s say you’re playing in the Key of C. There are no sharps or flats in the Key of C so your only half steps will be between B and C and between E and F (remember Buy Chocolate and Eat Fugde?) Here’s what the Key of C looks like on a violin in first position.


You can see the half steps, they’re the notes that are touching each other. You see how there are fewer half steps than whole steps. In fact there is usually only one pair of half steps for each string. Whatever key you are playing in, don’t worry about the whole steps, concentrate on remembering where the half steps are. This is how you build up your framework.

If I’m playing in the Key of C, all I have to remember is where the half steps are for each string. My framework looks something like this.

G string= B and C (2 and 3)
D string= E and F (1 and 2)
A string= B and C (1 and 2)
E string= No half steps (but your F is lower than your other first fingers since it is natural (not sharp or flat)

So when I am playing in the Key of C, I simply remember where my fingers touch on each string. Starting from the G string, I say to myself, 2-3, 1-2, 1-2, low 1. This way you don’t have to think, “Is that second finger high or low?”

As your fingers develop more and more muscle memory, you don’t necessarily have to think about these numbers, your fingers will naturally find where they need to be. But until then, practice thinking in terms of half steps.

Now you try. Let’s say we’re in the Key of G which has one sharp, F# (we’ll talk about why there’s an F# there in the next lesson). Your violin fingerboard is going to look almost the exact same except all of your F’s are going to move up one half step. What is your framework going to look like now? What are the numbers you are going to remember for each string?

Here’s the answer for your half steps in the Key of G:

Screenshot-2017-11-5 b3c9c739174d124e1bfdd1694c83d500--violin-fingering-chart-violin-music-sheets jpg (JPEG Image, 472 × 43[...](1).png

G string= 2 and 3 (B and C)
D string= 2 and 3 (F# and G)
A string= 1 and 2  (B and C)
E string= 1 and 2 (F# and G)


Try playing through a G scale starting at your open G string and going to your high G on the E string. Play it as fast as you can. You’re not thinking about notes, sharps, “high” 2s or “low” 2s. All you are thinking is 2 and 3, 2 and 3, 1 and 2, 1 and 2. Make those half steps fingers on each string super tight.

Can you play through the scale faster than you could if you were just thinking note to note? Keep working on it, just thinking about the half steps. The more you do it, the quicker it gets!

Try thinking of half steps in all of your scales. If you aren’t practicing scales, you should be! Check out my free scale sheets or order some of my favorite scale books. Scales really are the secret to better playing.

Embrace your half steps! They are the tiny building blocks for your left hand technique. Later we'll discuss  using half steps to help you play notes that span big leaps across the fingerboard, but first let’s talk a little about key signatures and scales.

Happy practicing!

To learn more about music theory and how it applies to the violin, check out my course Music Theory for Violinists: Everything You Need to Know. It’s part of my Online Studio Membership. Learn more here.

Major Scales and Key Signatures for the Violin

Major Scales.jpg

It would be pretty boring we played all music in the same key. But we can rearrange where the half steps are in a scale and get 12 different major keys. (Do you know how many half steps there are in a scale? That’s right, 12!) A major key can be built off of every half step in a scale.

C   D♭  D   E♭  E   F   F#   G   A♭  A   B♭  B  

You might be wondering why I sharped some notes and made others flat. That’s because you will play something in B♭ a lot more than you will play something in the key of A#. Look at the piano, B♭ and A# are the same note. That means they are enharmonic equivalents: the same note written two different ways.

Major Scales

How do major scales work? Well it all depends on the arrangement of whole and half steps. Start with C major. Can you write half or whole in between each note? Remember “Buy Chocolate” and “Eat Fudge". Half steps are going to be between those two pairs of white keys that touch on the piano keyboard.

Screenshot-2017-11-7 c major scale whole and half steps at DuckDuckGo.png

This is the order you get. Whole Whole Half Whole Whole Whole Half. I sum it up like this: WWHWWWH.

That’s the order of half and whole steps for all major scales which is why major scales sound the same. They have the same relationship between the notes. Try this exercise. Print out some blank sheet music. Notate an E (the first line on the treble staff). Without looking at a scale book and without thinking about your key signature for E, begin writing the scale just by the order of whole and half steps. Now compare your scale to an E major scale in your scale book. If you really  want to give yourself a workout, try doing this for the more complicated scales like A#.

So if you’ve ever wondered why the Key of G major has one sharp—F#, this is why. Start on a G, follow your half step whole step pattern for the major scale and you will end up with F#.

All scales have two sets of half steps. Think of the Key of C as your vanilla scale with your basic BC and EF half steps. Every time you add one sharp, you are changing these two sets of half steps. In the key of G, you haven’t changed anything with B or C so they are still half steps. But E and F are no longer half steps because you had to sharp that F. Now F# and G are half steps.

Screenshot-2017-11-7 what is a key signature - Google Search.png

What’s up with all those sharps and flats? They look like they are completely random but they always occur in a certain order. If you have one sharp, it will always be F#. If you have two sharps they will always be F# and C#. The order goes like this:

F# C# G# D# A# E# B#

Use the mnemonic “Fat Cats Go Down Allies Eating Birds” to help you remember the order.

For flats, the order is the reverse of what it is for sharps.

B♭ E♭ A♭ D♭ G♭ C♭ F♭

Remember “Bead Go Catch Fish” for flats.

You can number each note in your scale. We call these scale degrees. The numbers above the notes are the scale degrees.  Each note in a scale also has a name which are written below the note in the following picture.

Screenshot-2017-11-7 scale with scale degrees - Google Search.png

Don't worry about remembering the name for each scale degree. The most important ones are tonic, dominant, and the leading tone. Scale degrees and scale names are the same for major and minor keys.

Why do we call the seventh scale degree a leading tone? Because it wants to lead to tonic again. Try playing a scale and stop on the leading tone. You’ll be itching to play the tonic to feel complete. (Legend has it Mozart’s father would play scales in the morning ending on the leading tone. Young Mozart would jump out of bed, run down stairs, and play the tonic. Brilliant idea to get a prodigy up in the morning.)

You know what key you are playing in based on the key signature at the beginning of the music. Here’s a list of all the major (and their relative minor scales). Don’t worry about the minor scales for now. Try to memorize each key signature up through 5 sharps and 5 flats. In the violin, you will spend most of your time playing in the key signatures with 0-5 sharps or flats so focus on those.

key_signatures_chart.gif

Next we'll talk about minor scales!

Happy Practicing!