How to Care for Your Violin: Ultimate Guide to Violin Maintenance

Now that you have your new violin, you may be wondering, “how do I care for the violin?”

You want to keep your violin looking new and in tip-top playing condition and violin maintenance plays a big part in how your violin sounds.

Before we get into my violin care tips, I want you to remember one thing. While the violin is a delicate instrument and does require some care and maintenance, don’t be afraid of the violin. Yes, you want to take good care of it, but don’t be so terrified of hurting it that you are afraid to use it. Aside from bashing your violin against the wall, any minor things that happen to your violin during daily use can be fixed!

Before we get into the details about violin maintenance, first let’s talk about some general violin care tips when handling the violin!

Violin Care Tips

How to Handle the Violin and Bow

  • Always wash your hands before handling the violin

  • Hold the violin by the neck when you can. This is the safest place to hold the violin and allows you a good grip around the instrument. Avoid placing your hands all over the body of the violin since the oils on your hand can eventually hurt the varnish. Now, you will occasionally have to touch the violin body. Don’t worry, it won’t disintegrate. Just don’t make a habit of rubbing your hands all over it.

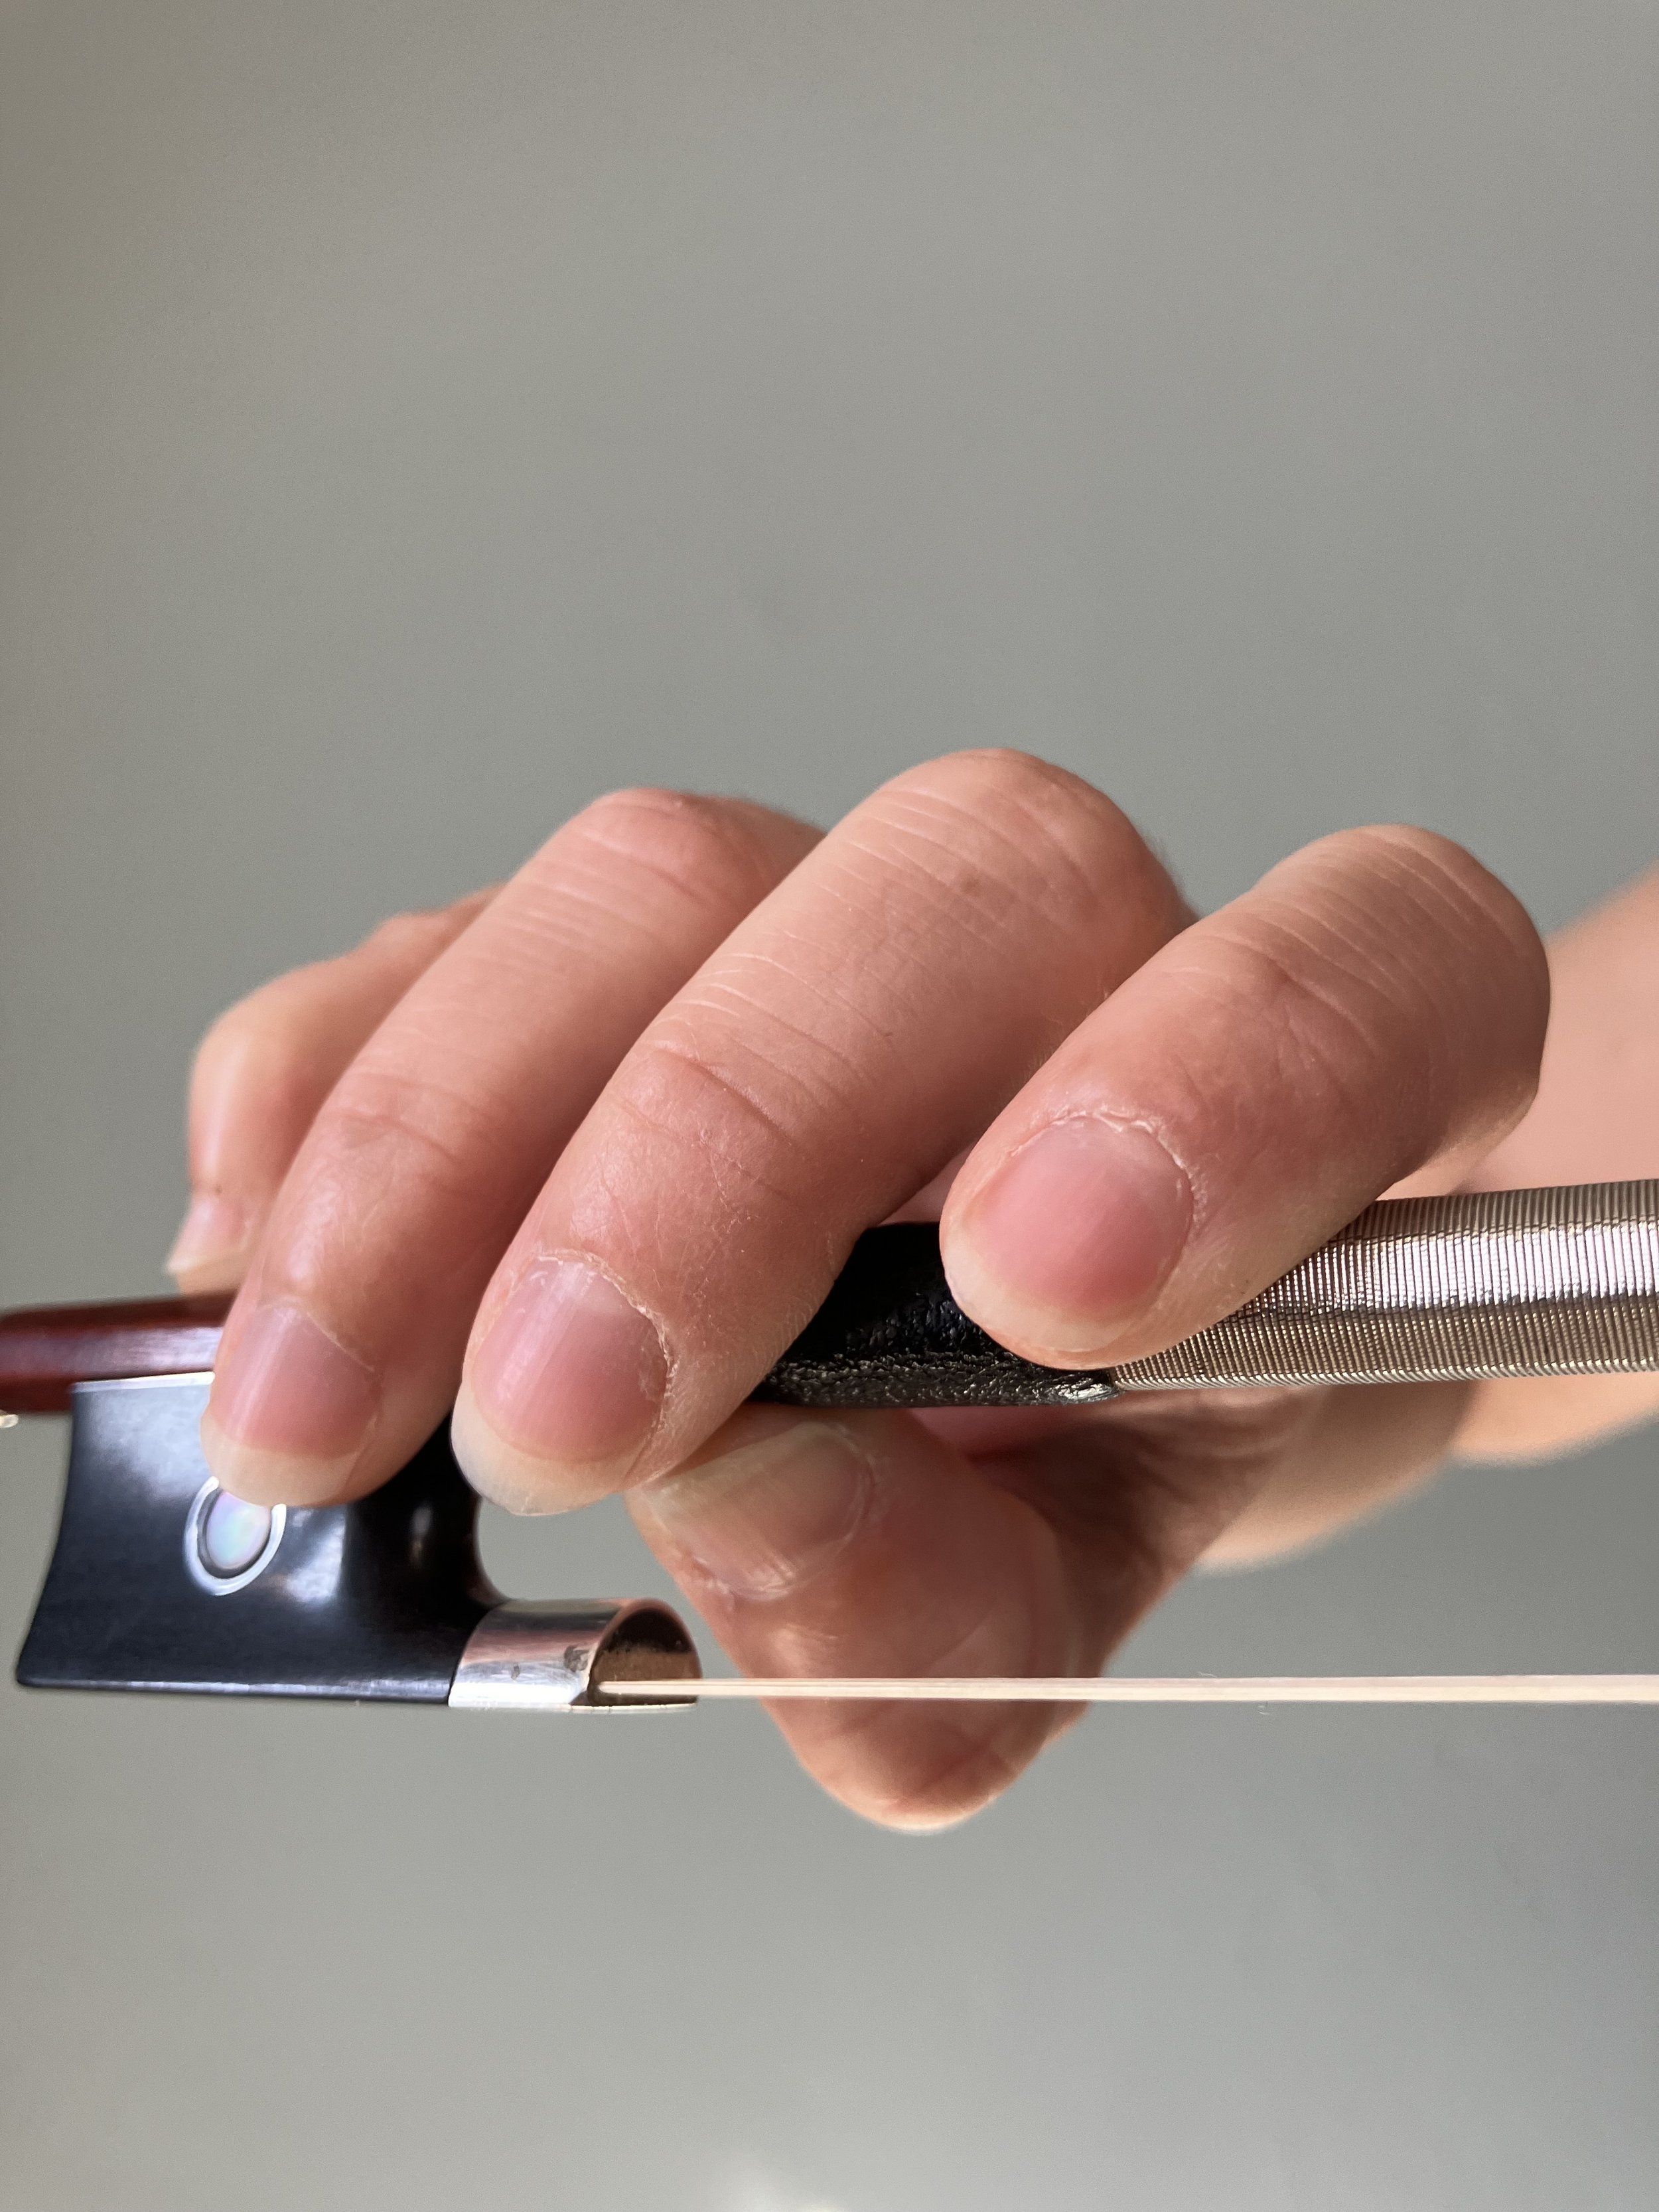
  • You also want to avoid touching the violin bow hair since the oils on your hand aren’t good for the hair. Again, don’t worry too much if you accidentally touch the hair.

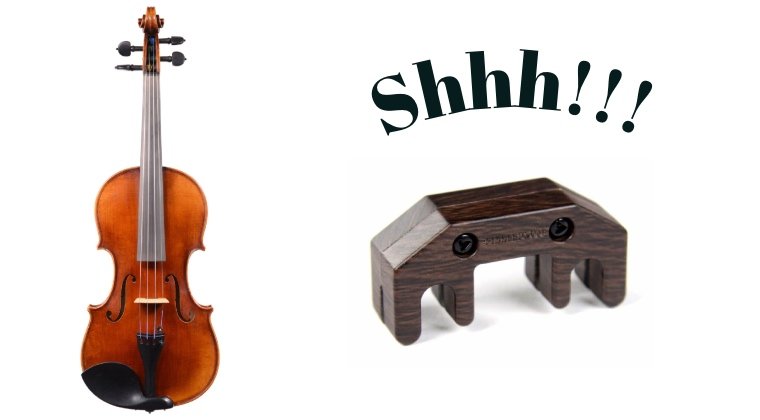
  • Don’t rest the violin upside down on its front. The bridge could crack!

Don’t rest the violin like this!

Understanding Affects of Temperature and Humidity on the Violin

Keep an eye on the Hygrometer in Your Violin Case

Your violin is made of wood and glue: two materials that don’t respond very well to excessive temperatures or drastic changes in temperature. So when considering violin maintenance, temperature and humidity should always be on your mind.

What does heat do to a violin? Excessive heat can make the glue melt. The wood will also expand, making the pegs swell, which means your pegs may stick and be hard to tune.

What do cold temperatures do to a violin? Cold temperatures will make the wood shrink. This can cause cracks to form in your violin. With cold weather, we often get drops in humidity, which is another important factor when it comes to violin care and maintenance.

How does humidity affect a violin? The violin needs to be kept in a place with a relative humidity between 40% and 60%. If it’s too dry, cracks can form. Too humid and mold can form. Neither of those things are good for violin care!

To control the humidity level around your violin, you can use in case humidifiers or humidifiers that fit into your violin body. I live in Arizona for a good part of the year so I use both! Here’s what I use:

You can also use humidifiers for the room where you keep your violin or dehumidifiers if it’s too humid.

The humidity level can also affect the bow which we’ll talk about when we discuss violin bow maintenance.

Do I Need to Keep the Violin in its Case?

While the case is safest place for your violin, as long as the temperature and humidity are in the correct ranges, I’m a big fan of leaving the violin out during the day. This makes it much easier to just pick up the violin and start playing. If you have pets or young children, make sure the violin is in a safe place. I love violin wall hooks for this reason.

Violin Storage, Temperature, and Humidity

  • Avoid leaving the violin case or the violin itself in direct sunlight.

  • Keep the violin in a temperature controlled room. If it’s too hot or cold for you, it’s too hot or cold for your violin.

  • Make sure the humidity level stays between 40% and 60%

  • Avoid leaving the violin in the car, especially if the temperatures are warm. Remember, however hot it is outside, it will be even hotter in your car. Now let’s face it, you will occasionally be somewhere where you just want to leave your violin in the car for a bit so let’s talk about that.

Can I Leave a Violin in a Car?

While many people say NEVER leave your violin in a car, let’s be practical and talk about when it’s okay and when it’s definitely not okay to leave your violin in a car. Over the course of playing violin for a few decades, I’ve definitely left my violin in a car a few times with no catastrophic results. So if you want to leave your violin in a car, there are a few things to consider.

  • How expensive is the violin? I’ve got a lot of violins. If I’m carrying around Maria, my REALLY nice violin, I’m much more hesitant about leaving it in the car for any reason or for any amount of time. If I’ve got one of my $200 budget violins I use for traveling, I’ll be more likely to leave it in the car if the following factors look good.

  • What’s the temperature? If I’m hot (around 90-95 degrees) the violin can only stay in the car for short trips. As in 5-10 minutes. If I’m in Phoenix in the summer (as in 95-115), the violin goes with me everywhere or just stays at home. If it’s comfortable but warm (80-90 degrees). I’ll be okay leaving the violin in the car for slightly longer periods, like eating a quick meal or doing some quick grocery shopping. If it’s cool and comfortable (55-70 degrees) I’m okay leaving the violin for a longer meal, a walk, or a little hike. If it’s getting colder (30-55 degrees), I’m back to just leaving it in the car for short amounts of time. If it’s really cold (30 and below), it’s going to go with me or stay at home.

  • Is it a safe place to leave the violin in the car? Another reason you want to avoid leaving your violin in your car is theft. While you never know exactly if it’s safe or not to leave your violin in the car for this reason, if you do leave it, make sure it’s concealed or in the trunk.

Taking Your Violin With You

There’s really nothing wrong with taking your violin with you when running errands if for some reason you’ve got the violin in the car with you. If I stop to eat while on a road trip with my violin, I simply take it into the restaurant. No one ever says a thing. Just don’t forget to take your violin with you when you leave!

Violin Care After Playing

Now let’s talk about how to care for your violin and bow after you are finished playing.

Daily Violin Maintenance

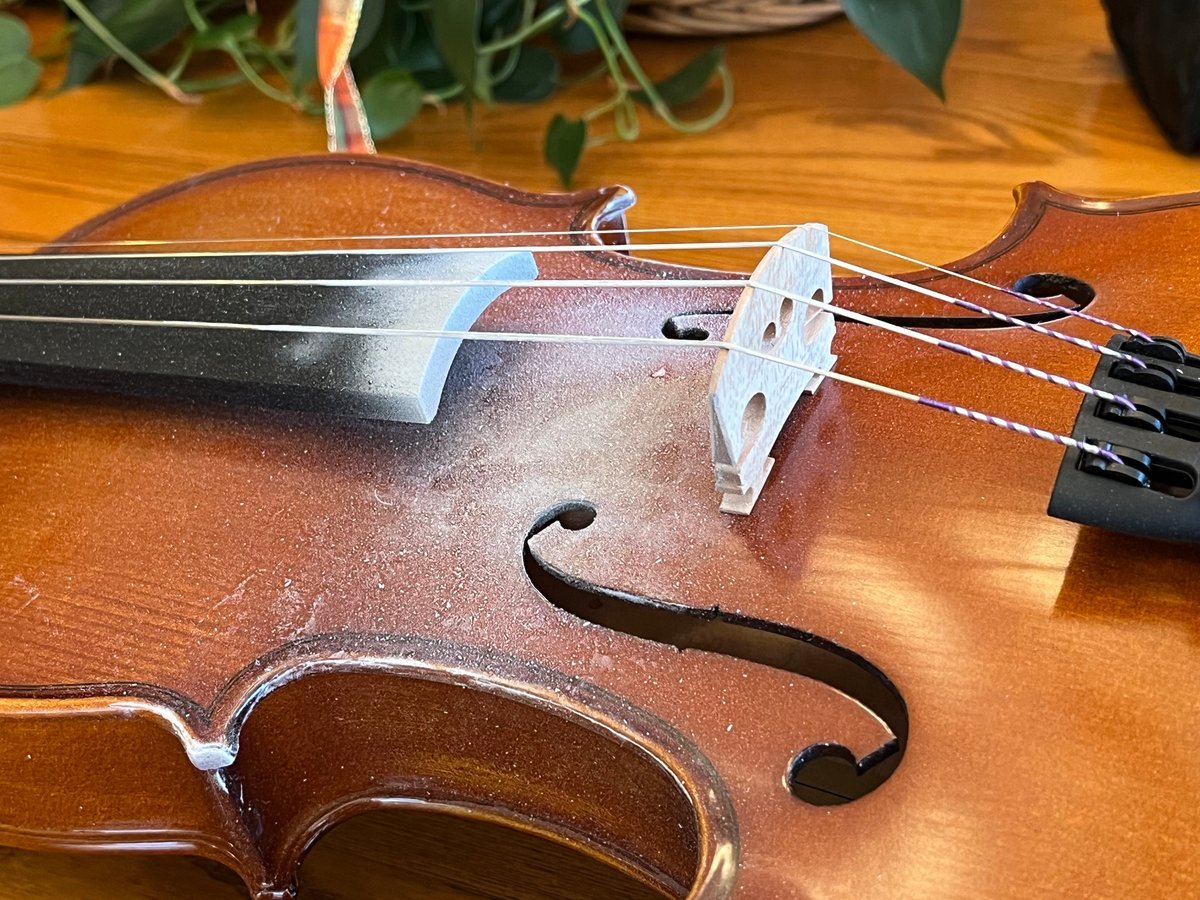
If it looks like you’ve been eating powdered donuts over your violin, you’re probably using a little too much rosin. Just make sure you wipe all of that off!

A big part of daily violin maintenance and cleaning has to do with rosin. Rosin is sticky. It’s good for getting the bow hair to grab the string, not so good for the varnish. You always want to remove any rosin dust from the body of the violin. If left on, over time the rosin dust will harden and become more difficult to remove. Eventually rosin left on the violin can damage the actual varnish. So make sure you…

  • Always wipe the rosin off of the violin with a microfiber towel. Make sure you get under the strings in between the bridge and the fingerboard, but also wipe the end of the fingerboard where rosin often collects. Simply thread the towel underneath the strings and use both hands to wipe the towel back and forth.

  • Wipe the rosin off of the stick of the bow (note, this may be something I do once a week. There’s not always enough rosin on the bow stick to justify wiping it down every time. If you do find there’s a lot of rosin on the stick after you play every time, you’re probably using too much rosin.

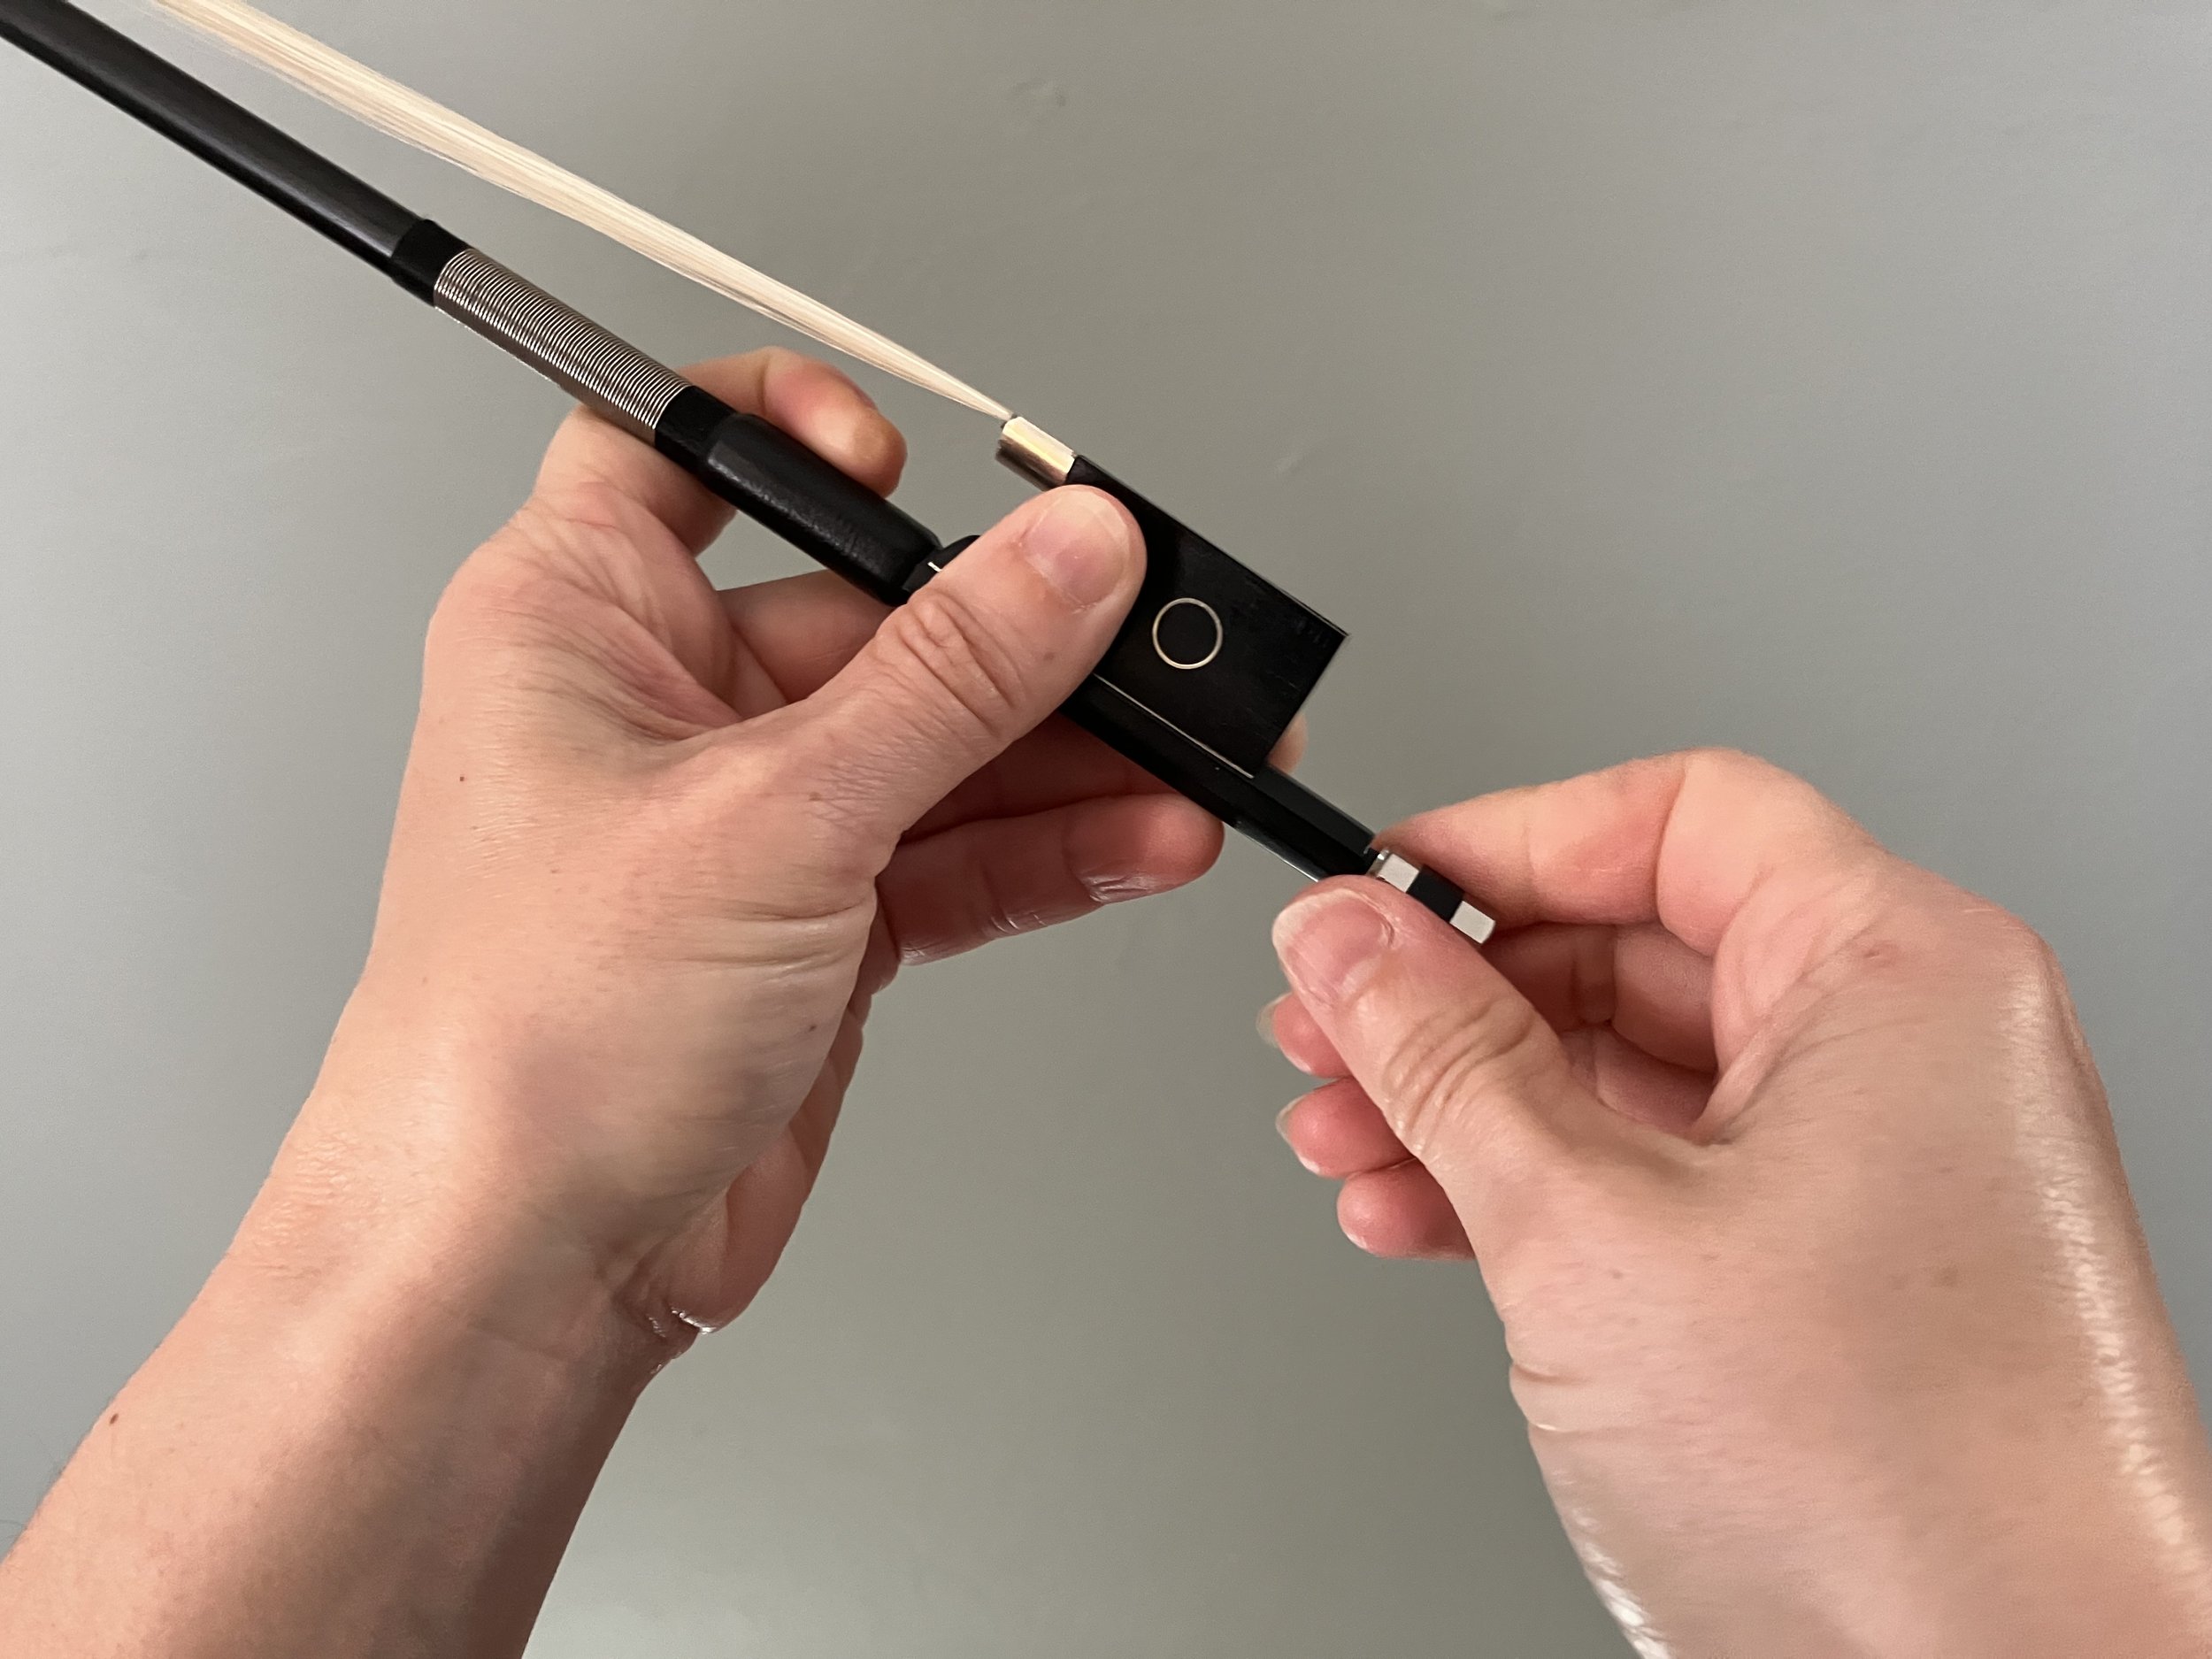
  • Always loosen your bow hair before storing the bow. There’s no need to unscrew the the hair, simply loosen the hair just enough so that the hair starts to touch the stick.

Weekly or Monthly Violin Maintenance Items

Every week or month, use a second towel (not your daily rosin towel) to wipe down the entire body of the violin, removing any dust that collects around the body and under the tailpiece.

If you have significant rosin build-up on the strings, you can use a small cotton pad with alcohol to remove the rosin for the strings. Just make sure the alcohol doesn’t get on your violin. If you’re worried, place a towel underneath the strings to catch any alcohol that might drip.

The type of towel you use for cleaning is very important.

I keep two cleaning microfiber towels for my violin. One is for wiping off rosin, and the other is for wiping off the body. Make sure you use an absorbent type of material like microfiber so the cloth actually picks up the rosin. For a while I was using some cotton cloths and cotton handkerchiefs. What I didn’t realize is that the cloth was just spreading the rosin up the fingerboard. So after a few months I had a very obvious rosin streak that my luthier had to clean off.

You may also want to vacuum your violin case every month to keep dust and debris at a minimum.

Yearly Violin Maintenance Items

At least once a year, replace the strings and get the bow repaired. You can replace the strings, but you’ll want to take the bow to a luthier to get it rehaired.

It’s also not a bad idea to get a yearly violin checkup at your local luthier once a year. The luthier can give your violin a deep clean and make it look like new. It’s also a great time to see if your violin needs any adjustments or fixes.

Violin Bow Care

  • When you are finished playing, wipe the rosin off of the bow stick (the wooden part).

At some point, you’ll open your case and realized we never loosened the Bow hair.

  • Always loosen the violin bow after playing. If you occasionally forget to loosen the bow hair, it’s not the end of the world. We’ve all done it from time to time. But if you keep the bow hair tight, it will reduce the life of the bow hair and cause the hair to stretch out over time.

Humidity can also play a part when it comes to the bow. When it’s humid, the bow hair is more elastic and it will take lots of turns to tighten the bow hair. Be careful if you take your violin and bow from a humid place (like outside) to a drier place (inside an air conditioned room). Make sure you loosen the bow hair, otherwise when the hair meets the drier air, it will tighten ever more. If the bow hair becomes to taunt, eventually it will start to snap.

How Much to Loosen Your Bow When you’re finished playing

About how much you want to tighten your bow to play

You may occasionally get single bow hairs that break or become loose. This is very common and totally normal. Simply take fingernail clippers and clip the hair as close to its base as possible. You can yank the hair out, and if you are in a performance setting, that’s usually your only option. It’s not the end of the world, but you could accidentally put too much force and yank all the hair out. So use clippers whenever possible.

Walking and Moving with a Violin in Hand

Last up in our discussion of violin maintenance: moving around with your violin. This isn’t topic that is often discussed when talking about how to care for your violin, but the closest my violins have ever come to complete destruction always involved me moving around. So here are my tips for keeping your violin and bow safe if you’re walking, climbing, or otherwise on the move with a violin in your hands.

Be wary of stairs

Recently I was walking up the TWO stairs in my RV with my violin. Somehow I tripped but luckily fell on my side. Meriwether, my violin was unharmed but it was a close call. My recommendation? If you have to go up and down stairs, no matter how few, put your violin in its case, ascend or descend, and then get the violin out.

Be wary of doors

Or rather, doorways. Doorways and bows are eternal enemies. When walking through a doorway with your violin bow, you may keep the violin close by your side, but you may forget the bow extends several feet from your body and then all the sudden...whack! Your bow gets snapped in two.

So a word to the wise, be mindful of doors and stairs!

How Can I Play Quieter on the Violin? A Guide to Playing Violin with Practice Mutes

If you’re learning to play violin, you might also be wondering, “how do I play violin quieter?”

The violin is meant to project. While that’s great for a concert hall, it’s not ideal when you’re playing violin in an apartment building or trying not to disturb a family member or neighbor.

Or maybe you’re practicing in a smaller space, and the violin is just too loud for your own ears. Is there a way to tone it down? Yes! While the violin doesn’t exactly have a volume button, you can reduce your volume greatly with mutes! 

What is a Violin Mute?

Sound waves travel from the vibrating strings, down the bridge, into the body of the violin, and then out the f-holes. You can’t keep your strings from vibrating, and you don’t really want to stuff a towel into your violin body, but you can put something over the bridge! That’s exactly how a violin mute works. It’s a material placed on the bridge to dampen the sound by reducing sound frequencies.

What kinds of violin mutes are there? 

An orchestral or Slide-On Mute

If you’re wondering how to use a violin mute to play quieter, you’ll want to be aware that there are several types of mutes and some work much better than others!  

First off, there are orchestral mutes also known as slide-on mutes. These are smaller mutes that don’t cover very much of the bridge. They are used in orchestral settings when a composer wants a more muted sound. The composer will denote this by writing con sordina (with a mute) in the music. Violinists usually keep orchestral mutes below the bridge where they don’t affect the sound. They can be easily moved on an off the bridge by sliding the mute up and down the strings below the bridge (hence the name “slide-on” mutes). While orchestral mutes dampen the sound, they are more for affect and aren’t very effective at turning down the volume of the violin.

If you want to turn the volume down on your violin and make it quieter for practicing, what you need is a practice mute. A practice mute is a piece of rubber or metal that covers the entire bridge and reduces the volume of the violin for quieter practicing. But there are different types of practice mutes as well!

Types of Violin Practice Mutes 

There are three types of violin practice mutes: metal mutes, metal mutes covered in rubber, and all-rubber mutes.

An all-metal practice mute will be the quietest option

The heavier the mute, the more it will dampen the sound. So all-metal mutes will give you the greatest reduction in volume. However, metal mutes can also damage your bridge and if you accidentally drop them and it hits your violin body? Eek! Some types of metal mutes are also quite tall, making it difficult to see over the bridge.

I use an all-rubber violin practice mute when I don’t want to be too loud. I actually use one of these quite often (hey, I live full time in an RV!) Sometimes you find yourself parked pretty close to another camper at a campground. Or maybe you want to play outside but you don’t want everyone in the campground to hear you practice. Or sometimes my ears just need a break from a really loud violin in a really small space. I’ve found that all-rubber mutes reduce the volume but don’t mute the violin so much that it’s not enjoyable to play. With an all-rubber mute, it still sounds like a violin, not a toy.

Metal mutes encased in rubber are a good go between all metal and all rubber violin practice mutes. You’ll be able to play quieter than an all-rubber mute, but it’s a little safer than all-metal practice mutes. If you’re nervous about sharing walls, waking up your neighbors or family members, this can be a good route to go.

Benefits of Playing Violin with a Practice Mute

Can playing with a practice mute help your playing? Actually, yes it can. The violin produces a lot of overtones. That means it’s very resonant and ringy. When you play one note, you’re not just hearing that one frequency, you’re hearing all of the overtone frequencies as well. That resonance can help when it comes to playing in tune, but sometimes it can make it more confusing.

I’ve had students say practicing with a practice mute helped their intonation immensely by cutting down on all those ringy overtones. That allows them to just hear more of the fundamental frequency and make adjustments as necessary.

Can Playing with a Violin Practice Mute Hurt My Playing? 

If you always have to play with a practice mute, you may struggle with learning all of the intricacies of tone production, dynamic contrast, and tonal shading. That’s really where the fun comes in when learning violin.

So if you find yourself in a situation that requires using a violin practice mute for months on end, I would also suggest finding a place where you can play without the mute occasionally.

If you don’t have a place where this is possible, I suggest calling around to local churches. Oftentimes churches are staffed and open during the week, but they don’t necessarily have something going on in all of the Sunday School rooms. Call around and explain your situation, it might take a few tries but you’ll probably find a church somewhere that doesn’t have an issue with someone practicing violin in one of their empty rooms. I’ve taught many a violin lesson in a church Sunday School room during the week myself!

Happy (Quiet) Practicing!

Is It a Good Idea to Buy a Used Violin? A Violin Teacher's Opinion

If you’re thinking about learning violin, you may be wondering if it’s better to buy a new or used violin? Are used violins cheaper? Will used violins sound any good? Are old violins better than new violins? Maybe you found a cheap violin at a thrift store and you’re wondering if you’ve discovered a treasure?

Let’s dive into the details when it comes to buying a used violin!

Where you should and should not buy used violins

 If you were to ask me, “should I buy a used violin,” the next question I would have for you would be, “where are you buying it from?”

If you are buying a used violin from a reputable violin shop or luthier, yes, it’s probably fine. If you are buying a used violin from the thrift store, an antique store, Ebay, Facebook Marketplace, or any other private seller, I would be wary of purchasing the violin unless you are really sure of what you’re getting. Keep reading to understand why it pays to be a little hesitant!

 Is it cheaper to buy a used violin?

To put it simply, probably not. A good, basic beginner violin will cost you around $250-$300. (Those cheap $60 violins you see on Amazon and Ebay aren’t really violins. They’re VSOs--violin shaped objects. So they don’t really count.) The issue with used violins is that even if the violin is in good condition, you will want to put on a new set of strings and get the bow rehaired (if it comes with a bow). Since you don’t know when the strings were replaced or how much playing the strings and the bow hair have endured, you’ll want to just put on a new set of strings and rehair the bow. Old strings and old hair can affect the sound and make playing downright frustrating. A new set of strings will cost you $40-60 for a good set and a bow rehair will be $50-75. When you are considering these replacement costs, it’s often cheaper just to buy a new violin with new strings and new bow hair.

If the violin is NOT in good condition, then you will have to pay a luthier to fix whatever issues are making the violin unplayable. While some things can be fixed, some things can’t.

 How do I know if a violin is in good condition?

We’re missing something here…I guess this is a do-it-yourself kind of violin set-up

If you aren’t familiar with violins, it will be very hard to know if the violin is in good condition. Even if it looks okay on the outside, there could be cracks or warping that aren’t always obvious.  

Violins do require some special care and attention. They need to be protected from extreme temperatures. If it’s too hot, glue will start to melt. Too cold and the wood will start to shrink and form cracks. They also need to be stored where the relative humidity is between 40%  and 60%. Too humid=mold. Too dry=cracks.

The problem with buying used violins is that you don’t know its history. Has it been stored in an attic for years? Is there mold hiding inside of the body?

Cracks and mold can be very expensive fixes, so make sure you purchase used violins from a reputable dealer to avoid hidden costly repairs.

Oftentimes, used violins will be missing some critical parts, like a bridge. Or maybe the soundpost inside is loose and rattling around (or gone completely). These will all equate with things that need to be fixed to make the violin playable.

Can I buy a used violin if I’m just starting to learn violin?

If you are brand new to the violin, I would encourage you to buy a new violin unless you are purchasing an older violin from a reputable string shop or luthier.

You can tell a lot about how a violin has been cared for based on the pictures. Please, don’t rest a violin upside down on its bridge!

Learning violin has its own set of challenges. You don’t want to be struggling with violin maintenance issues or make it harder on yourself by playing on substandard equipment. 

If you are purchasing the used violin from a reputable string shop, you know the violin has been checked over for any issues and probably had the strings replaced. In that case, it’s perfectly fine to buy a used violin. And it may even be cheaper than its new counterpart.  

Will used violins sound any good?

If it’s a good quality violin that has been well-cared for, yes, it will sound good. It will probably sound even better with a new set of strings. If it’s a poor quality violin to begin with, age won’t help it much.

The problem is knowing if the violin was good quality to begin with. If you are familiar with violins brands, it may be possible to know what’s a good deal and what isn’t. Nowadays, there are hundreds of cheap violins being sold on the internet. Even though they look new, that does not mean they are playable. Many “new” violins are VSOs (violin shaped objects). They may look like a violin, but the similarities stop there.

DOn’t be fooled by new-looking used violins. They may be VSOs (violin shaped objects) and poor quality to begin with

Are older violins better?

While some of the best sounding violins in the world are old, that doesn’t mean that a violin has to be old to sound good. Just because a violin is new doesn’t mean the wood is new. Even with new violins the woods has been aged for years before it is carved into a violin. (Unless of course, the “new” violin is a VSO, in which case all bets are off.)

Well made, new violins can have marvelous sounds (all of my violins have been new). Oftentimes new violins are cheaper than a similar sounding old violin. Old violins have a certain allure, and violin dealers know that and price their violins accordingly. While there’s nothing wrong with wanting a violin for its history and charm, always use sound as the primary comparison when purchasing violins!  

Be wary of deals too good to be true

A Strad I found on Facebook for $1,000! A bargain considering the going price is a few million.

Did you find a Stradivarius violin for $1,000? An old, antique violin for $399? Go ahead and pass. Thousands of student violins were produced in the nineteenth century with the label “Stradavarius.” This was a simple marketing ploy, so don’t fall for it now. The violin may or may not be worth something, but if the person you are buying it from believes it is a Stradivarius, it’s definitely not worth what they are asking.

I often see antique violins being sold on Ebay or Facebook Marketplace for exorbitant prices simply because they are “old.” These are often being sold by someone who has little to no understanding of violins and thinks that a violin has worth simply because it is old. It might be worth something, but rarely is it worth what they are asking.

So can you buy a used violin?

Yes if… 

  • You are buying from a reputable dealer, violin shop, or luthier

  • Have an eye for what you are buying and know how to look for things that will be costly to repair.

 I would be hesitant about buying a used violin if you are…

  • A brand new player just learning violin (unless you purchase from a good string shop)

  • Buying from an antique store, thrift store, or other private seller.

  • Don’t know how the violin has been taken care of. 

Can You Find Good Violins at a Thrift Store?

I’m no stranger to antique stores, thrift stores, flea markets, and Goodwill. I love a good find. However, over the course of playing violin for around 20 years, I have yet to spot a violin I would pay more than $5 for. And I would NEVER pay for what people were asking.

A violin that has been…Well Loved or not loved at all?

While I’ve never found a good deal or anything even worth playing, I’ve had one student who found a great deal at a thrift store. She spotted a violin worth around $400-$500 in good condition for around $45. However, she had been playing for about a year and knew what to look for. The more you play, the more familiar you will become with violin. And just maybe, you’ll find a great violin at a bargain price!

While used violins may be a good deal if you can find them at string shops or luthiers, be wary of violins sold by private sellers unless you know what you are looking for.

If you’re just starting to learn violin and you just need your hands on an instrument, check out the following links to help you make a decision.

-Top 10 Violins for Beginners

-Should I Rent My First Violin? 

Happy Practicing!

Why Does My Violin E String Whistle? And How Do I Stop It?

Violin E strings are notorious for whistling occasionally. This whistling is common and can be extremely frustrating. But why do E strings whistle like that?

Normally, the bow causes the strings to vibrate side to side, but when the string vibrates abnormally in a torsional or twisting motion, you get an E string whistle. This whistle only occurs on the E string because E strings on the violin are normally unwound. Wound strings, like your G, D, and A strings are not as susceptible to this abnormal twisting motion of the string.

How can I stop my E string from whistling?

Anything that detracts from a clean start can cause the violin E string to whistle. Dirty bow hair or too much or too little rosin can contribute to the whistle.

However, I’ve noticed that the most common culprit is slurring and bow speed. You might notice the E string whistles more when slurring from the A string. This is often because the bow speed is too fast for the E string, resulting in a sloppy start to the vibrations, causing the twisting motion of the string.

Here are my recommendations for stopping your E string from whistling.

  • Wipe off excess rosin off of the E string

  • Slow the bow speed as you change over to the E string.

  • Add more weight in the bow as you change to the E string (I imagine something pulling my right elbow down to help me add more weight).

  • Play closer to the bridge with more weight to get a cleaner start.

  • Change the bowing so you avoid slurs over to the open E string.

  • Change the fingering so you avoid playing the open E string.

  • Some strings tend to whistle more than others. You may also try changing your E string.

Happy Practicing!

How (Not) to Hold the Violin Bow: 5 Steps to Form a Natural, Relaxed Bow Hold

The way you hold the violin bow is directly correlated to the sound you are producing. A relaxed bow hold will help you produce a good tone, allow for smoother string crossings, and eventually give you the tools to play fast sections and do advanced bow strokes.

Whether you are learning a beginner bow hold, of if you’ve been playing violin a while, it’s a great idea to rethink how to hold the violin bow properly for the best control and relaxation. So if you’re not completely happy with that tone you’re producing it might be time to reevaluate your bow hold.

Let’s talk about how to hold the violin bow for beginners and the common mistakes I see with bow holds and how those mistakes can negatively affect your sound.

Also visit, How Much to Tighten Your Bow: The Ultimate Guide to Tightening and Loosening Your Bow

Is it a Bow Hold or a Bow Grip?

When learning how to hold the bow, you will hear both terms: bow hold and bow grip. I dislike the term bow grip because “grip” implies force and tension. You want to avoid tension at all costs when it comes to the bow, so I avoid calling it a bow grip. The term bow hold is better but even that has its negative connotations.

You really aren’t even holding the bow. Once you learn to form a relaxed bow hold, you will realize you’re just balancing the bow between the thumb and the fingers. So instead of a bow hold, it should be called a bow balance. But I’ll keep calling it a bow hold for traditions sake!

Is There a Correct Way to Hold a Violin Bow?

While there are many variations on the violin bow hold, there are many common mistakes people have when it comes to learning to hold the violin bow. Holding the bow incorrectly will negatively affect your sound. The way you were originally taught to hold your violin bow can have a lasting affect on your bow hold, even if you’ve matured beyond those beginning stages.

So before we get into how to hold your violin bow correctly, let’s talk about some approaches to holding the bow that don’t yield good results.

A lot of methods use what I call the “one finger at a time approach.” You put this finger here and this finger here and the pinky on top and curve your thumb underneath… And then you usually end up with something unnatural.

The one finger at a time approach doesn’t work because each finger in the bow hold has to work together as one cohesive unit.

Another method I’m not a huge fan of is the “bow hold bunny.” This method involves the middle two fingers touching the thumb like the bunny’s teeth and the pinky and index finger sticking up in the air like the ears. When you do this on the bow it’s like the bunny is eating the stick and then you flop the ears down on the stick. In my opinion this approach to holding the violin bow has a lot of different problems. For one, it’s going to make the middle two fingers be unnatural close to each other. It also tends to make people pinch the bow with the middle fingers. And then the pinky and the index finger are unnaturally spaced.

Avoid the dreaded, unnatural, bow hold bunny monster

This approach might be fine for very young children. But I think mature children and adults benefit from a different approach when it comes to beginner bow holds and learning how to hold the violin bow properly.


How to Hold the Violin Bow

This is how I teach students to hold the violin bow. And even if you’ve been playing for a long time, I think it’s always a good idea to revisit the basics of bow hold and see if there’s anything you could do differently to relax more and get a better tone.

Bow Hold Step 1: Get the Fingers Relaxed

The first step to learning to hold the violin bow is to put down the bow! We’ll get to that later.

Get your fingers relaxed

Next I like to have students hang their right hand by their side and relax the hand. Shake the hand if you want to get rid of any tension. Don’t think about anything. Overthinking how to hold the bow usually results in bad bow holds.

Now, bring the hand up until the arm is horizontal. Continue to let the fingers dangle. That’s usually a perfect beginner bow hold. The fingers are naturally spaced with a gentle curve. They’re not abnormally straight, nor are they abnormally curved. The thumb is gently curved as well. For the standard bow hold, you also want the elbow to be even with the wrist and the knuckles. You don’t ever want the knuckles or the fingers to be above the wrist for a standard, beginner, middle of the bow bow hold.

Now we just have to figure out where will the bow touch the fingers?

Bow Hold Step 2: Learning Where the Fingers Touch the Violin Bow

When learning how to hold the violin bow for beginners, always start with a pencil. I use a pencil to demonstrate where the fingers are placed in a perfect violin bow hold. 

If I keep my hand relaxed with the knuckles, wrist, and elbow even, all I have to do is bring my pencil up until the pinky can rest on the pencil.

Bring the pencil up to your pinky

make sure you have part of your fingers on top of the pencil

I bring my pencil up until the pinky comfortably rests on the stick and the middle knuckles or the area right below the middle knuckles are also resting on top of the stick.

Having fingers on top of the stick is very important because that’s how weight is going to be transferred into the stick and that’s how you produce and good tone.


Bow Hold Step 3: Place the Thumb

One of the most common questions I see when it comes to forming a beginner violin bow hold is where do I place the thumb?

Place the thumb underneath the pencil where ever it naturally falls, usually between the 1st and 2nd fingers. The important thing is to not overthink where the thumb is placed. Where does your thumb go to naturally balance the fingers that are on top of the stick?

One very important thing to remember when it comes to forming the bow hold is to gently curve the thumb. You never want a “hitchhiker’s thumb” that is unnatural bent backwards and locked.

Avoid the stiff, bent hitchhiker’s thumb

avoid bending your thumb back like this

Bow Hold Step 4: Slant the Fingers

You want to have a slight slant with the fingers so that everything is leaning just slightly towards the index finger.

Bow hold with no slant

bow hold with slight slant towards index finger

And that’s your beginner’s bow hold! Do you see how forming everything as one cohesive unit makes for a more natural and relaxed bow hold? Continue practicing your violin bow hold on a pencil wherever you are. But now let’s move on to forming the violin bow hold on the violin bow!

Violin Bow Hold Step 5: Forming the Violin Bow Hold With the Bow

When it comes to forming the violin bow hold on the bow, people tend to fall back into a “this finger goes here, this finger goes here approach.” Avoid this approach at all costs and try to always form the bow hold as one cohesive unit.

Start off by holding the bow horizontal with your left hand holding the bow at the tip.

Now, get your right hand relaxed again and place it on top of the stick right in the middle of the bow. That area is just like a pencil. Place your thumb, gently curved underneath the stick, wherever it naturally falls.

Then with your left hand, pull the bow and let your hand slide down to the frog until your thumb hits the tip of the frog. Your thumb will rest right at the tip of the frog, not inside that tempting little space inside the frog.

Form the bow hold in the middle of the bow

slide the bow hold down until your thumb hits the top of the frog

And that’s how you form a natural, relaxed bow hold.

Common Beginner Bow Hold Mistakes

When it comes to learning how to hold the violin bow, there are many mistakes beginners make that can negatively impact the sound and your joy of playing! Let’s talk through some common bow hold mistakes.

Bow Hold Mistake #1: Bending the Thumb Back

This locks the thumb and makes it unmovable and inflexible. You need that thumb to be relaxed to produce a lovely sound! So relax the thumb and let it naturally curve.

Bad thumb

good thumb

Bow Hold Mistake #2: Pinching the Stick with the Fingers

Don’t try to pinch the stick to hold the violin bow.

Let the fingers dangle over the stick. Remember, you aren’t really holding the bow and you’re definitely not gripping the bow! You’re really just balancing the bow between the fingers and the thumb.

Most people try to pinch the bow because they feel very uncomfortable balancing the bow on the thumb.

This is very understandable. Practice balancing the bow hold over a soft pillow or mattress if you are afraid of dropping the bow.

As you can see by the picture, pinching the bow with the tips of the fingers leads to a very straight pinky, and a bent back thumb.

All of the fingers are locked and inflexible which will contribute to a stiff sound. You need those fingers to move like little shock absorbers or springs, so loosen up and let those fingers drape over the stick!

Bow Hold Mistake #3: Not Curving the Pinky

Avoid locking the pinky straight

You also don’t want the pinky to be straight and locked (unless, you are playing in the upper half of the bow). Keep that pinky gently curved and on top of the stick.

Notice when your pinky is straight and locked how immovable it is. We need that pinky to flex just like all of the other fingers.

When the pinky locks on the violin bow, there’s a good chance it’s forcing the thumb to bend back and lock as well.

So relax all of the fingers. Practice holding your bow over something soft if you are afraid of dropping it.

And we’ve all dropped violin bows. It still happens to me sometimes and I’ll wonder what in the world just happened.

It’s not a bad idea to practice in a room with carpet, or place a rug in your practice area.

Bow Hold Mistake #4 Placing the Thumb Inside the Frog

It might be tempting to place your thumb inside that little dip in the frog, like the picture below. But don’t do it! Place your thumb at the tip of the frog, in between the tip of the frog and the leather grip.

Avoid placing the thumb inside the frog

place the thumb at the tip of the for and in between the frog and the leather grip

Do Fiddlers Hold the Violin Bow Differently?

A fiddler’s bow hold at the balance point

Is there a different way to hold the fiddle bow? While there is no difference between a violin bow and a fiddle bow, some fiddlers do hold the bow higher up on the stick. This facilities fast string crossings and easier double stops and compliments the style of playing.

If you are a beginner just starting to learn to play, I recommend holding the violin bow at the frog, even if you only want to fiddle. If you can hold the bow at the frog, you can hold it at the middle. But it’s harder to hold the bow in the middle and then transition to holding it at the frog.

Conclusion: Holding the Bow the Right Way

The bow hold is absolutely crucial to good tone production and advanced bow strokes. Having a natural, relaxed bow hold is not something you’ll be able to master in one day. It takes time to teach the muscles to relax and be in control of the stick. So give yourself time but reevaluate your bow hold often. Since the violin bow hold is so crucial to your sound, it’s a topic I talk a lot about in my online studio. I’ve got lots of lessons and workshops on the bow hold, so if you’re interested in seeing what my online studio has to offer, learn more here!

Happy Practicing!

Once you learn to hold the bow correctly, learn the secret to better bow control and relaxation!

How Tight Do You Tighten A Violin Bow?: The Ultimate Guide to Tightening and Loosening Your Violin Bow

When you first receive your violin bow, the hair will probably be touching the stick. You have to tighten the violin bow which forces the hair to stretch and move away from the stick in order to play. But a common question when it comes to learning how to tighten the violin bow is “how MUCH do I tighten the violin bow?”

Well, it depends.

When you are just beginning, you can learn to tighten the violin bow by sight. But as you become more comfortable playing, you will learn to tighten the violin bow based on feel.

When you are finished playing, you will want to loosen the hair on your violin bow to release the tension.

But first let’s talk about the mechanics of tightening and loosening a violin bow.

How to Tighten a Violin Bow

Hold the violin bow horizontally in front of you with the frog to the right. You’ll notice a silver screw at the very end of the frog. Turn the screw away from you and watch the middle of the bow. You’ll begin to see the bow hair moving away from the stick.

Also notice the frog. Do you see how the frog moves as well when tightening the violin bow? The more you tighten, the more space is created between the tip of the frog and the leather grip. This is the place where your thumb goes so if you find there’s not enough space for your thumb, tighten the bow a little more.

Notice how Tightening the bow changes the space between the frog and the leather grip

the looser the bow, the less space between the frog and the leather grip

The Rule for Tightening the Violin Bow

Eventually, you will tighten the bow based on sight and feel, but if you are a beginner here is a rule for tightening your violin bow by sight.

Notice the stick of the violin bow is curved with the stick dipping down towards the middle slightly.

To tell how much to tighten your bow, turn the screw until you can fit your pinky in between the violin stick and the hair at the middle of the bow.

Watch the middle of the bow as you tighten and continue turning the screw until you could fit your pinky in between the stick and the hair in the middle of the bow. You have to look at the middle of the bow because if you look at the ends, you will see the hair is further away from the stick. Use the middle as your gauge.

Now, the “pinky” rule is a good place to start. However, I notice that most people don’t tighten the bow enough when using this rule. So tighten the violin bow so that your pinky with a little bit of space on either side can fit in between the stick and the hair.

Tighten the bow until you can fit your pinky in between the hair and the stick in the middle of the bow

What Happens if You Tighten a Violin Bow Too Much?

Can you over tighten a violin bow? Yes! Over tightening a bow can damage the bow. When you over tighten the bow, the stick will be very straight without any of that natural curve. All that extra tension can warp or break the stick. You’ll also over stretch your hair which means you will have to continue over tightening your bow just to get to a “normal” tightness because the hair is too loose. You’ll have to get the bow rehaired sooner rather than later.

Over tightening the bow also makes it harder to play. The bow is too stiff when the hair is too tight resulting in unwanted bounces and scratches. The bow will be harder to control when the hair is too tight.

Can You Play if Your Violin Bow Hair is Too Loose?

When people learn that over tightening the violin bow can damage that expensive wooden stick, they tend to under tighten the bow.

While under tightening the bow will not damage it, it will make it harder to play. When the violin bow is too loose there is no resistance. You need a little give in the hair to be able to apply and release weight to get a good tone.

Just like Goldilocks, it’s all about getting it just right and that comes down to learning to tighten the violin bow based on feel.

How to Tighten the Violin Bow by Feel

Eventually, you will be able to feel if your violin bow is too tight or too loose as you play violin. The best way to learn to do this is to experiment. Try barely tightening your violin bow and then play something. You’ll notice there is no resistance or “give” in the violin bow. You can’t apply any weight into the string.

Now try slightly over tightening the violin bow (don’t worry, this will just be for a second). Play something now. Notice how the violin bow is too stiff and also looses some of its resistance and give. The bow is probably so stiff when it is overtightened that it is much easier to bounce the bow and get unwanted bounces.

Loosen the bow until you feel the correct amount of resistance.

How Much Do I Loosen the Violin Bow

When you are finished playing, you will want to loosen the hair on the violin bow. This will your hair to last longer and reduce the tension on the stick. But how much do you loosen the violin bow?

Most people tend to loosen the bow too much when they are finished playing. Simply loosen the screw until the hair is just touching the stick. That’s it! You can put your violin bow to bed now!

The correct amount to tighten the violin bow

The Correct amount to loosen the Violin Bow

Do I have to loosen the bow every time I finish playing?

If you’re just taking a short break, it’s fine to leave the violin bow hair tight. If you’re taking a longer break or if you are done for the day, it’s best to go ahead and loosen the bow hair.

What happens if you loosen the bow too much?

The hair will get very loose and floppy and eventually you will unscrew the screw completely. Don’t worry! You didn’t break your violin bow. Simply reinsert the screw and tighten it again. You may notice when you loosen your violin bow too much, the screw detaches and the frog detaches as well. Again, you didn’t break your bow. Reinsert the frog into the hole where it was attached, reinsert the screw and tighten.

if you loosen the bow too much, the screw may come out

and the frog may detach! don’t worry, reinsert the frog and the screw, retighten, and you’re good to go!

I forgot to loosen my bow hair! Is it okay?

That moment when you realize you forgot to loosen your bow hair last night

You close up your violin case and completely forget to loosen the bow hair. When you open up your case the next day, to your horror you see the violin bow is already tight! EEK! Is the bow damaged? Did you ruin that expensive stick?

Don’t worry, this happens to all of us at some time (sometimes multiple times…) Repeatedly forgetting to loosen the bow hair will not necessarily damage the bow, but you will have to rehair the bow sooner as the hair is getting stretched out more and more.

Can I replace the hair on my violin bow?

Yes, you can and you should! The bow hair wears out eventually and looses its “grippiness.” No matter how much rosin you apply, the bow will feel like it’s slipping across the strings. Simply take your bow to a local string shop or luthier and have them rehair the bow. This will cost anywhere from around $70 and up depending on your location.

You should rehair your bow at least once a year. Rehair your bow every 3-4 months if you play more regularly (2 hours a day and up).

Does weather and humidity affect violin bow hair?

Absolutely. Humid weather will make the violin bow hair stretch and lengthen, making it harder to get the correct amount of tension. You will tighten and tighten and tighten the screw and eventually the hair will have the correct amount of tension. The danger occurs if the humidity changes and turns drier, then the hair will constrict and your violin bow will be too tight.

This is particularly a problem when playing outside or going in between playing outside and inside. Keep an eye on the humidity and try to keep the humidity around 40%-60%.

Why won’t my violin bow tighten?

Hight humidity can make it harder to tighten the bow. If the bow hair is old, or if the bow hair has been overstretched, it will be hard to tighten the bow. Getting a bow rehair will fix this problem.

Sometimes there may be an issue with the screw. Cheap violins that come with cheap bows can often be difficult if not impossible to tighten due to the inferiority of the parts. If you’re playing a a very cheap bow (Under $50) and you’re violin bow won’t tighten, you may need to upgrade to a better bow.

I hope this helps you with all your questions when it comes to tightening and loosening the violin bow. If I didn’t cover something, let me know in the comments below.

Happy Practicing!

How to Tune a Violin (Without Breaking the Strings!) A Beginner's Ultimate Guide to Tuning

It’s vitally important to tune your violin every time before you start playing. But learning how to tune your violin as a beginner may seem intimidating. Once you understand a few things about tuning, you’ll see that tuning your violin is not as hard as it may seem.

Let’s talk about how to tune your violin and common tuning problems you may encounter (like the dreaded broken string!) Spoiler Alert: don’t worry, broken strings happen to everyone, but keeping a few things in mind will help you avoid breaking any strings!

Okay let’s get started by talking about a few music theory basics before we jump into learning how to tune the violin.

Important Musical Concepts for Better Violin Tuning

The musical alphabet consists of the notes A through G. If you started with an A and went up to a G and then kept going after that, the next note would be an A. It’s the same pitch as the first A you started on, just 8 steps higher. We call that an octave.

You can have lots of different As, they’re all the same note, just occurring at different frequencies or octaves. On your tuner, the octave in which that pitch occurs is notated by a little number next to the pitch.

So you see, if I play my open A, that tells me I’m playing an A4, if I play the A that’s an octave lower, that’s known as A3.

The names of your strings and the octaves that correspond with those pitches are:

How Tuners and Tuning Apps Work


Now let’s talk about how a tuner or a free tuning app works. I like to use the INS tuning app but most tuning apps work in a similar fashion. When you play a note, the name of the note and its octave number register on your screen. You’ll get a pitch and a number next to it. If the note is in tune, you’ll get a green light. You’ll notice there’s a bar that moves across the screen. In some tuners, this bar is depicted as a dial or a light on the left and the right of the pitch. If the note is too high or too sharp, the bar will be to the right on the sharp side. If the note is too low or too flat, the bar will be on the left side. The bar moves closer to the center as you get closer to being in tune.

How to Tune Your Violin Using the Fine Tuners

The fine tuners are the little screws on your violin tailpiece. They make small adjustments to the string.

(Why do some violin only have one fine tuner?)

A violin with 4 fine tuners on the tailpiece

You can hold your violin different ways when you’re first learning to tune, but I recommend starting off with the violin against your stomach. Pluck a string and then adjust the fine tuner. The fine tuner works just like a screw. Righty tighty, lefty loosey. So if you want the string to be more taught or higher in pitch, turn the fine tuner to the right or clockwise. If you’re too high or too sharp and you need to go lower, loosen the fine tuner by turning it left or counter clockwise.

Now tuners can be finicky because the microphone is picking up on other noises, so as long as it’s flashing green pretty regularly, that’s good. Now move on to the next string and repeat the process until you’re finished tuning.

You can also progress to tuning with the violin on your shoulder if you like. Pluck the strings with the left hand and tune with the right hand like this…

Tuning the violin using the fine tuners while playing pizzicato

Tuning the violin using the fine tuners and the bow

Now if your strings are close to being in tune, maybe a half step away or less. Use the fine tuners. If it’s really out of tune, for instance if your A string is registering as a G, then you’re going to have to use the pegs.

How to Tune the Violin Using Pegs

There’s a few tricks when it comes to learning how to tune the violin using the pegs. Let’s say my A string is registering as a G. The string is too low for the fine tuners to do anything so I’m going to have to tune the violin using the pegs. Trace the string up to its peg. The A string’s peg is the top peg on the right. Hold the violin neck firmly with the left hand and pinch the peg in between your fingers with the right hand. I always like to release the tension on the peg first by slightly turning it back or towards me. Keep a firm hold on the peg because you don’t want it to loosen completely. As the tension releases, you’ll feel a little click. Now if you let your hand go of the peg, that peg could possibly loosen completely so keep the pressure on it. Now turn the peg away from you as you apply a little bit of pressure towards the peg box to help that peg get wedged into the hole.

Once you’re relatively close, use the fine tuners to get the string perfectly in tune.
Now that’s the basics of how to tune the violin for beginners using pegs or fine tuners, but it’s not always that simple so lets talk about some issues you might run into when it comes to tuning the violin.

Possible Tuning Problems When Learning to Tune the Violin

We talked about the musical alphabet consisting of the notes A through G. Well, in between each of those notes (well in between almost all of the notes) there’s a half way point. So in between each note there’s a sharp or a flat note. In between A and B there’s an A#, It’s a half step higher than an A. Now sharps and flats are really 2 sides of the same coin. So a B flat is the same note as an A#. It’s a half step lower than a B which is the same as an A sharp. You’re just thinking about it in different ways.

So in between G and A, there’s a G sharp or an A flat.

Occasionally, your string may be so flat, the tuner will actually show an A with a a little flat sign next to it. Or if the A were too high, it might even register as a B flat which is the same thing as an A sharp.

It’s important to pay attention to see if there is a flat or sharp symbol next to the note name because you could accidentally tune your A to an A flat. I’ve had some students occasionally show up to lessons with their violin perfectly tuned to an A flat.  So as you’re tuning, make sure you’re not tuning to a sharp note or a flat note.

How to Tune the Violin Without Breaking A String

Why is the violin so hard to tune? a question of the ages

Every beginner’s nightmare is the possibility of breaking a string while tuning. We all accidentally breaks a string at some point, but I’m going to try to help you avoid that!

The easiest string to break on the violin is the E string since it is very thin. Because of its thin diameter, it’s easy to over tighten the string. At some point, the string will snap if you continue to tighten it too much. Anytime you are tuning the E string, especially if you are tuning using the peg, make very small adjustments and stop to check the pitch with the tuner very often.

We’ve all broken E strings so it’s a good idea to have some extras on hand. Here are my recommendations for the best violin strings!

To prevent breaking strings while tuning the violin on any of the other strings, always make small adjustments and avoid over tightening the string.

Why won’t my violin strings stay tight?

Sometimes you tune your violin and the strings continue to loosen. There are a couple of reasons why violin strings don’t stay tight.

  • New Strings: new strings take time to stretch out. It may take a few days of frequent tuning before the strings settle out and stay tight.

  • The pegs aren’t wedged in the peg hole. Remember when I said to apply a little pressure towards the peg box while tuning the violin using the pegs? This is to help wedge the peg into the whole to prevent the peg from slipping. Slipping pegs equal loose violin strings.

  • Low Humidity. Dry air will make the wooden pegs shrink and slip. Try to maintain the ideal humidity level in between 40-60% humidity to prevent your violins strings from loosening.

  • Low Quality Violins. If you are using a violin on the cheaper side, poor quality workmanship will contribute to pegs that continue to slip and strings that never stay tight.

    (Get my top 10 Recommendations for Good Quality Beginner and Intermediate Violins)

How often does a violin need to be tuned?

Tune your violin every time before you start playing. Be very precise with tuning and don't settle for “almost” in tune.

People have struggled with tuning for centuries

Getting a violin perfectly in tune is very important since we don’t have frets, keys, or stickers. Muscle memory is how you learn to always place your fingers in the right place. If the violin strings are always slightly different in pitch every time you play, you will never develop the correct muscle memory to be able to play in tune.

Another reason to tune your violin every time before you start playing has to do with sympathetic vibrations of the strings. When you play one string, the other strings are sympathetically vibrating. So make sure those vibrations are in tune!

Why do some violins only have one fine tuner?

More expensive, higher quality violins often only have one fine tuner on the E string. Fine tuners can affect the sound or be the source of buzzes and unwanted noises. If you are comfortable tuning using the pegs, there’s no need for that potential effect on the sound.

A violin with only one fine tuner

The advent of steel strings also plays a part in the use of fine tuners. Before steel strings, when all strings were gut, fine tuners weren’t necessary. Gut is stretchier than steel. However, it’s very hard to make small adjustments with steel strings, especially on the E string. When steel strings were introduced in 1919, fine tuners became a necessity and continued to be used for E strings up until today.

Learn more about why some violin have only one fine tuner here.

Do Professional Violinists Use Fine Tuners?

If more expensive violins usually come with only one fine tuner, you may be wondering if professionals use fine tuners? Many professional violinists don’t use fine tuners (except on the E string). This has to do with aesthetics and sound as more fine tuners may negatively affect the tone production.

However, I’ve seen several famous violinists and fiddlers with more than one fine tuner on their violin. So there is no judgment or shame when it comes to using fine tuners!

Why is tuning a violin so hard?

Tuning a violin is definitely harder than tuning a guitar or a mandolin. Why is tuning a violin so hard? Guitars have geared pegs whereas most violins use traditional pegs. A traditional peg is just a wooden peg inside of a hole. That means humidity and weather can make tuning a violin harder as the wooden peg swells or shrinks. Wood that hasn’t been properly dried will also contribute to difficulties tuning the violin. Poor workmanship and cheap violins is yet another contributor that makes it hard to tune the violin.

Geared pegs look the exact same as traditional ebony pegs

The nature of wooden pegs also makes it hard to tune the violin because it’s difficult to make small adjustments. This is especially frustrating for violins with only one fine tuner.

You can skip a lot of the tuning frustrations by installing geared pegs onto your violin. Geared pegs look just like traditional pegs, but they are geared much like guitar pegs making tuning much easier. Geared pegs have many names and brands like Perfection Pegs or Planetary Pegs. You can get geared pegs installed at your local luthier or violin shop. I have geared pegs and I will never go back to traditional pegs!

Learning to Tune Your Violin is an Art Form!

Tuning is definitely a skill and an art form in an of itself so if. And there’s more to it than just using a little machine and a flashing green light. You should be working on making progress in your tuning abilities the same way you work on getting better intonation or a better tone. Using a tuner is a great way to learn to tune the violin for beginners, but there are better ways to tune and learning more advanced tuning techniques will actually strengthen your ear, help your understanding of tone and sound production, and improve your playing overall.

If you’re ready to learn how to tune the violin by ear or how to tune the violin using double stops, check out my Art of Tuning Course which is included when you sign up for the Meadowlark Violin Online Studio. Happy Tuning!


Why Do Some Violins Have Only One Fine Tuner?

Why do some violins have four fine tuners? Why do other violins have only one fine tuner? Do you need to have four fine tuners? Do only beginners have fine tuners?

To understand why some violins have one fine tuner and some have more, we need to discuss a little bit of violin string history.

(Also visit How to Tune a Violin (Without Breaking the Strings!) A Beginner’s Ultimate Guide to Tuning the Violin)

Why Violins Have Fine Tuners

Before the advent of steel strings in the early 1900s, strings were made of gut. Since gut is quite stretchy, fine tuners weren’t necessary. When steel strings came onto the stage in 1919, fine tuners became necessary for violin E strings.

Steel is not as stretchy as gut, therefore it’s much harder to make smaller adjustments with a thin, steel E string. Accidentally over-tightening an E string will make it break. So fine tuners that could make small adjustments became useful for steel E strings.

Fine tuners on violins were pretty handy and it made sense to use them on all the strings for beginner violins to make the tuning process easier for beginners.

Do I Need Four Fine Tuners on My Violin?

You don’t have to have fine tuners on every string. If your pegs work correctly and you don’t have trouble tuning, you can get by with only one fine tuner on the E string. However, there’s no shame in having four fine tuners.

If you have geared pegs on your violin, fine tuners probably aren’t necessary. (It’s still handy to have them on the E string).

Some beginner violins come with tailpieces with four fine tuners built in to the tailpiece. Other violins come with tailpieces that have holes where the strings attach allowing you to add or remove fine tuners to suit your needs.

A Violin with Fine Tuners Built Into the Tailpiece

A violin with REMOVABLE fine tuners and only one fine tuner on the E string

Why do some violins have only one fine tuner?

You will often find that more expensive, higher quality violins often only have one fine tuner on the E string. Usually, more advanced violinists purchase the more expensive violins, so there’s an assumption that the violinist purchasing the violin is comfortable with tuning using the pegs. If the fine tuners aren’t necessary, there’s no need to put them on a violin.

However, you don’t have to be an advanced player to play on an “advanced” violin. Violins that are categorized as “intermediate” or “advanced” are simply more expensive and usually better quality. They don’t require people with advanced skills to play them. On the contrary, high quality violins are much EASIER to play than beginner violins!

So if you’re a beginner and you want to spend the money on a high quality violin, go for it! If you’re worried about having trouble tuning if the violin has only one fine tuner, I recommend getting geared pegs installed. I have geared pegs on my violin and I would never go back to traditional, wooden pegs!

Do Fine Tuners Affect the Sound of a Violin?

Another reason that some violins have only one fine tuner is due to the affect fine tuners can have on the sound. Anytime you add something to a violin, a chinrest, a different tailpiece, it will affect the sound. The more “stuff” you put on a violin, the more potential for buzzes or unwanted noises. If you are comfortable tuning using the pegs, there’s no need for that potential effect on the sound.

Can violinists really tell the difference in sound between a violin with four fine tuners and a violin with one fine tuner? This is hard to say because all of the high quality instruments I’ve ever played have had one fine tuner and all of the cheaper, beginner violins have always had four fine tuners. The cheaper violins didn’t sound cheap because they had four fine tuners, they were simply made from cheaper materials.

I’ve never had a reason to install more fine tuners on my personal violins, so I can’t say if adding fine tuners negatively affects the sound in an obvious manner.

Do Professional Violinists Use Fine Tuners?

If more expensive violins usually come with only one fine tuner, you may be wondering if professional violinists use fine tuners? Many professional violinists don’t use fine tuners (except on the E string). This has to do with aesthetics, the ease of tuning with the pegs, and sound.

However, I’ve seen several famous violinists and fiddlers with more than one fine tuner on their violin. So there is no judgment or shame when it comes to using fine tuners!

To sum it up, if you want to use fine tuners, use them! If you’re a beginner, thinking about purchasing a violin without four fine tuners and wondering if that’s okay, it absolutely is! If you can afford it, I always say go for the nicer, higher quality violin (even if it only has one fine tuner). Get geared pegs installed and you won’t miss the other fine tuners.

Happy Practicing!

Down Bow, Up Bow, Slurs, or Separate? Choosing Good Violin Bowings

How do you know when to use a down bow or an up bow? What’s the difference between down bows and up bows? How do you add in bowings when none are written? How do you change bowings when they are written? Are there any rules for choosing good violin bowings?

These are all very common questions about violin bowing that don't get enough attention. Let’s dive into the world of violin bowings!

Down Bows or Up Bows: How to Choose the Correct Bowing Direction

First let’s talk about up bows and down bows. Down bows are when the bow moves from the frog towards the tip. Up bows are when they bow moves from the tip towards the frog. Down bows and up bows are notated by two different symbols.


In general (and this is very general), use down bows for strong beats or down beats and up bows for off beats or weak beats. If you have a single pickup note, it’s usually an up bow. Some passages might feel awkward starting on a down bow, or they might feel awkward starting on an up bow, sometimes it doesn't really matter.

To understand if you should use a down bow or an up bow, try experimenting with both and see what makes sense. You can also try starting in different parts of the bow. This can greatly affect how comfortable and natural the bowing feels.


Down Bows vs. Up Bows: General Rules for Violin Bowings

Most “rules” in music can be broken! But here are some general rules for choosing between down bows and up bows on the violin.

Use down bows for:

  • Strong beats or down beats

  • Forte or loud sections

  • Accents

  • When you need to travel to the upper half of the bow

  • Decrescendos

  • Long, slow bows (especially when they have a decrescendo at the end)

  • The last note of a phrase or song (especially when the last note ends with a decrescendo)

Use up bows for

  • Weak beats or pick up notes

  • Piano or softer sections

  • When you need to travel to the frog

  • When approaching a note that needs to be played “off” the string

  • Crescendos

  • The last note of a song when you want to end with a flourish, a crescendo, or come off the string.


Slurs and Separate Notes

A slur is when we connect multiple notes into one bow. This bowing is notated by a curved line connecting all of the notes in the slur.

Separate notes, or notes that are not connected by slurs are notated different ways. Most often, notes that are separate don’t have any indication other than the absence of a slur. Sometimes separate notes have individual down bows and up bows over each note. Other times you will notice dots or dashes over the notes to indicate articulation and to show that each note is distinct or separate and not slurred together. Playing each note on a different bow is sometimes often referred to as a detaché bow stroke.


How to Choose Good Violin Bowings

Choosing good violin bowings depends on several factors. I would break down my bowing strategy into five groups: ability/ease of playing, sound, tempo, style, and necessity. Let’s talk about each violin bowing strategy!

Ability: How the Level of Your Playing Affects What Bowings You Choose

Sometimes I’ll see a printed bowing and think, “there's no way I can play that bowing!” Or at least, I’m not ready to do it yet!

So I change the bowing to make it easier for my playing ability. For instance, if I’m learning a piece and the printed bowing wants me to slur eight notes in one bow, I might split that up until the tempo is faster and I’m ready to tackle all of those notes in one bow. If I’m dealing with big string crossings, I usually avoid a slur because it’s harder to make it sound good. It’s fine to change bowings to make it easier on yourself. Although you also want to challenge yourself to be able to play more difficult bowing combinations sometimes as well!

Slurring two notes will be easier than slurring four notes at slower tempos.

Easier

Harder


Sounds: Choosing Violin Bowings Based on the Sound You Want to Portray

This is where slurred bows or separate bows come in to play. If I want a smoother sound, I’ll slur the notes together. How much do I slur? Do I slur two notes, three notes, four notes? It depends on the tempo and how much bow I want to use, and what I can comfortably fit into one bow. Separate bowings have their place too and often add to a variety in sound. If EVERYTHING is slurred together in various combinations of slurs, playing detaché or using separate bows can make something stand out (in a good way or a bad way!) It depends on the sound you’re aiming for.


Tempo: Speed Affects What Violin Bowings You Should Use

This is a big one that I don’t think we think about enough. Tempo plays a big factor when determine what bowing you should choose.

The slower something is, the harder the slurs and long bows will be to play on the violin. It’s much easier to slur eight sixteenth notes in a fast tempo than eight quarter notes in a slow tempo. This is also one reason why the bowings might change from your initial “learning” tempo, to your actual performance-ready tempo.

Style and Musicality: Choosing Violin Bowings for Different Musical Styles

When it comes to musicality, more advanced bow strokes come in to play like hooked bowings, louré bowings, “off” the string strokes like spiccato and staccato, or even bow lifts. As you get a feel for different styles of playing (Baroque, Classical, Romantic, Fiddle) you’ll get an idea for what bow strokes would work best in certain areas. When it comes to musicality, if you have an important, long, accented note you would probably want to start it on a down bow at the frog. If you want to start something very softly, you would start at the tip on an up bow.


Necessity: Choosing Violin Bowings Often Depends on What Needs to Happen

A lot of decisions fall into this category. You might change a bowing somewhere just to make a bowing further down the line work out. Sometimes certain bow strokes or bowings are used for musicality, but sometimes they’re more for bow planning. For instance, if there was a certain note you really wanted to start at the frog, you might slur the previous notes into one long up bow to get you where you need to be. Use the bow as a tool to help you!


When You Can’t Change the Bowings

As a violin teacher, I always encourage my students to make their own decisions when it comes to choosing bowings. If there is a bowing you don’t like, as long as you are consciously changing it and have a good reason, that’s fine with me!

However, there are certain times when changing a bowing to fit your own needs is a no-no. And that’s orchestra time! Everyone needs to bow in the same direction in orchestra. So if you’re part of an orchestra, coming up with your own violin bowings probably isn’t the best idea unless you are the concertmaster or principal second! However, if you do have suggestions for bowings, ask your section leader or conductor.

The Takeaway When it Comes to Choosing Violin Bowings

So as you can see, when it comes to deciding on violin bowings the main thing to remember is…it depends. Choosing good violin bowings depends on your ability, the tempo, style characteristics, and your own personal decisions of musicality and phrasing. Most of all, deciding what bowing to choose comes down to trial and error. And this is where experimenting comes in handy. And you know what I think about experimenting!

Happy Practicing!

P.S. The bow is your most useful tool for creating musicality, expression, and phrasing. Do you want to learn more about how to control the bow, relax while playing, and develop a better sound? The Secret to Better Bow Control is just one of the courses you get access to when you become a Meadowlarker and sign up for my online studio! Learn more here.